Runner게임은 모바일 게임에서 필수 요소가되었습니다. 게임 개발자는 조만간 비슷한 것을 만들어 달라고 요청할 것입니다. 게임 개발에서 수년간 일하면서 그래픽을 만들기 전에 종종 게임을 잘 코딩해야합니다. 예술가들이 멋진 예술을 끝내기를 기다리는 동안, 나는 추상적인 그래픽을 사용할것입니다. 내가 같이 일했던 한 디자이너는 이것을 "dev art"라고 불렀습니다.
다음은 내가 사용할 기본적인 기술입니다.
- 우리의 영웅, 주인공.
- 서있을 그라운드.
- 뛰어 넘을 블록.
- 점프 할 높이를 나타내는 파워메터.
첫 번째 부분에서는 기초를 설정하고 파워 미터가 작동하도록 하겠습니다.
기본 템플릿
나는 내 자신의 기본 템플릿을 사용하고 있습니다.이 기본 템플릿은 약간의 시간을 절약하기 위해 만든 기본 템플릿입니다.
여기에서 다운로드 할 수 있습니다.
이미지 추가하기
먼저 프리로드 기능에서 키와 경로를 제공하여 이미지를 미리 로드합니다.
game.load.image("ground","images/ground.png");
game.load.image("hero","images/hero.png");
game.load.image("bar","images/powerbar.png");
game.load.image("block","images/block.png");
하늘 만들기
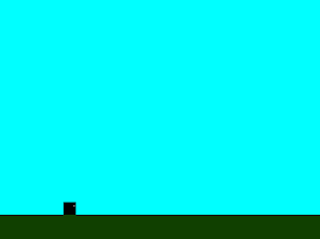
영웅은 검은 색 사각형이므로 무대 색상을 하늘색으로 변경합시다.
이것을 create 함수에 두십시오.
//turn the background sky blue
game.stage.backgroundColor="#00ffff";
메인 파트 추가
이제 땅을 만들겠습니다. 모바일 크기가 다양하기 때문에 화면의 높이의 90 % 또는 바닥에서 10 %로 바닥을 둡니다. 나중에 조정할 수 있습니다. 주인공의 키는 25px이므로 지상과 같은 y 위치에 놓고 땅바닥에 서게 하려면 25를 빼면됩니다.
//add the ground
var ground=game.add.sprite(0,game.height*.9,"ground");
//add the hero
this.hero=game.add.sprite(game.width*.2,ground.y-25,"hero");
게임은 이제 다음과 같이 보일 것입니다.
파워 미터
파워미터는 전원이 바뀔 때마다 추가 할 수 있고 너비를 변경할 수있는 작은 비트 맵입니다. 플레이어는 마우스 또는 손가락을 누른 상태에서 mouseUp 이벤트가 호출되면 점프하여 전원을 변경합니다. 마우스가 길수록 높을수록 점프가 됩니다.
먼저 변수를 변경해야합니다.
다음 코드를 create 함수의 맨 위에 놓습니다.
this.power=0; |
다음으로, 우리는 영웅의 머리 위 오른쪽에 25 픽셀, 영웅의 좌표보다 25 픽셀 위의 파워 바를 놓습니다.
//add the power bar just above the head of the hero
this.powerBar=game.add.sprite(this.hero.x+25,this.hero.y-25,"bar");
this.powerBar.width=0;
리스너에 mouseUp 및 mouseDown을 추가합니다.
//set listeners
game.input.onUp.add(this.mouseUp, this);
game.input.onDown.add(this.mouseDown, this);
mouseDown이 호출되면 타이머가 시작되어 전원이 계속 증가합니다. mouseUp이 호출 될 때 우리는 그 타이머를 멈춤니다. 우리는 Phaser.Timer.Second / 1000에 타이머를 설정할 것입니다. 이것은 타이머가 1 초에 1000 번 실행된다는 것을 의미합니다. 이렇게하면 부드러운 파워 바 효과를 얻을 수 있습니다.
mouseDown:function()
{
this.timer=game.time.events.loop(Phaser.Timer.SECOND/1000, this.increasePower, this);
},
mouseUp:function()
{
game.time.events.remove(this.timer);
this.power=0;
this.powerBar.width=0;
},
이 항목에서 마지막으로 다루는 것은 파워 변수를 증가시키고 파워 바의 너비를 변경하는 increasePower 함수를 설정하는 것입니다. 우리는 현재 50의 힘을 제한 할 것입니다.하지만 게임이 개발되면 나중에 변경할 수 있습니다.
increasePower:function()
{
this.power++;
this.powerBar.width=this.power;
if (this.power>50)
{
this.power=50;
}
},
이 단원의 마지막 코드는 다음과 같습니다.
var StateMain = {
preload: function() {
game.load.image("ground", "images/ground.png");
game.load.image("hero", "images/hero.png");
game.load.image("bar", "images/powerbar.png");
game.load.image("block", "images/block.png");
},
create: function() {
this.power = 0;
//turn the background sky blue
game.stage.backgroundColor = "#00ffff";
//add the ground
var ground = game.add.sprite(0, game.height * .9, "ground");
//add the hero in
this.hero = game.add.sprite(game.width * .2, ground.y - 25, "hero");
//add the power bar just above the head of the hero
this.powerBar = game.add.sprite(this.hero.x + 25, this.hero.y - 25, "bar");
this.powerBar.width = 0;
//set listeners
game.input.onUp.add(this.mouseUp, this);
game.input.onDown.add(this.mouseDown, this);
},
mouseDown: function() {
this.timer = game.time.events.loop(Phaser.Timer.SECOND / 1000, this.increasePower, this);
},
mouseUp: function() {
game.time.events.remove(this.timer);
this.power = 0;
this.powerBar.width = 0;
},
increasePower: function() {
this.power++;
this.powerBar.width = this.power;
if (this.power > 50) {
this.power = 50;
}
},
update: function() {}
}
결과는 다음과 같습니다.
'PROGRAMMING > Phaser Js' 카테고리의 다른 글
| Phaser Js 로 Runner 게임 만들기 Part - 3 (0) | 2018.01.29 |
|---|---|
| Phaser Js 로 Runner 게임 만들기 Part - 2 (0) | 2018.01.29 |
| Phaser Js 로 사이몬 게임 만들기 (0) | 2018.01.29 |
| Phaser Js 에서 Toast 메시지 추가하기 (0) | 2018.01.29 |
| Phaser Js 에서 두 객체 사이의 각도를 확인해 봅시다. (0) | 2018.01.29 |


