HTML5GAME :: 'PROGRAMMING' 카테고리의 글 목록 (4 Page)

달력

82025  이전 다음

  • 1
  • 2
  • 3
  • 4
  • 5
  • 6
  • 7
  • 8
  • 9
  • 10
  • 11
  • 12
  • 13
  • 14
  • 15
  • 16
  • 17
  • 18
  • 19
  • 20
  • 21
  • 22
  • 23
  • 24
  • 25
  • 26
  • 27
  • 28
  • 29
  • 30
  • 31

HTML5 게임 엔진 인 Phaser로 만든 다중 플랫폼 게임 인 Monster Wants Candy의 소스를 분석해 보겠습니다. 이 방법으로 엔진에 대한 실질적인 소개를 얻게되며 자신 만의 HTML5 모바일 및 브라우저 게임을 제작하는 데 사용할 수있는 개념을 배우게됩니다.


소개

HTML5 게임을 만들려면 프레임 워크 또는 엔진을 선택하는 것이 좋습니다. 물론 평범한 JavaScript로 할 수도 있지만 프레임 워크를 사용하면 개발 속도가 크게 빨라지고 편하게 개발할수 있습니다.


Phaser는 헌신적 인 커뮤니티가있는 최신 HTML5 게임 개발 프레임 워크로, 아직 들어 본 적이 없다면 반드시 시도해야합니다.


Phaser 란 무엇입니까?

Phaser는 데스크톱 및 모바일 HTML5 게임을 제작하기위한 프레임 워크입니다. 그것은 Photon Storm에 의해 만들어졌습니다. 이 프레임 워크는 순수한 JavaScript로 작성되었지만, 어떤 경우에는 TypeScript 정의 파일을 포함합니다.


Phaser 코드는 Flash gamedev 플랫폼 Flixel을 기반으로하므로 Flash 개발자는 바로 느낄 수 있습니다. 내부적으로 Pixi.js 엔진을 사용하여, 가능한 경우 Canvas 또는 WebGL을 사용하여 화면의 모든 부분을 렌더링합니다.


그것은 아주 새롭지 만 HTML5GameDevs 포럼에서 활발한 커뮤니티의 도움으로 빠르게 성장하고 있습니다. 사용할 수있는 자습서와 기사가 이미 많이 있으며, 공식 문서와 개발 중에 매우 도움이 될 수있는 수많은 예제를 확인할 수도 있습니다. 오픈 소스이며 GitHub에서 무료로 사용할 수 있으므로 소스 코드로 직접 들어가서 배울 수 있습니다.


Monster Wants Candy 무엇입니까?

게임을 제작할 때 먼저 핵심 아이디어를 생각하고 작동하는 프로토 타입을 신속하게 설정하려고합니다. 이 사례 연구에서는 Monster Wants Candy라고 불리는 게임의 간단한 데모부터 시작합니다.


프로토 타입으로 작업하는 대신 프로젝트의 구조를 먼저 보여 주므로 전체 아이디어를 이해할 수 있습니다. 그런 다음 Assets로드에서 부터 메인 메뉴 제작 및 실제 게임 루프에 이르기까지 게임의 개발 단계를 거치게됩니다. 지금 Monster Wants Candy 데모를 보시면 우리가 함께 일하는 것을 보실 수 있습니다.


코딩은 Enclave Games의 Andrzej Mazur가 담당했으며  모든 그래픽 Assets은 Blackmoon Design의 Robert Podgórski가 만들었습니다.


Monster Wants Candy의 이야기는 간단합니다. 사악한 왕이 당신의 사랑을 납치했고 그녀를 되찾기 위해 충분한 사탕을 모아야합니다. 게임 플레이도 간단합니다 : 과자가 떨어지고 있고 그들을 먹을 수 있습니다. 캔디를 먹으면 얻는 점수가 많을수록 좋습니다. 당신이 무엇이든 놓치고 화면에서 떨어지면 생명을 잃고 게임은 끝납니다.


보시다시피 매우 단순한 게임이지만 구조가 완벽합니다. 프레임 워크의 가장 중요한 용도는 이미지로드, 스프라이트 렌더링 및 사용자 활동 감지와 같은 작업에 해당합니다. 또한 코드를 복사하고 코드를 시작하고 자신 만의 게임을 만들 수있는 좋은 출발점이됩니다.


프로젝트 설정 및 구조

Phaser를 시작하는 방법에 대해 프레임 워크 작성자가 직접 작성한 이 유용한 기사를 읽거나 GitHub phaser.min.js 파일을 프로젝트 디렉토리에 복사하여 처음부터 작업을 시작할 수 있습니다. 

IDE가 필요하지 않습니다. 브라우저에서 index.html 파일을 실행하기 만하면 소스 코드에서 변경 한 내용을 즉시 볼 수 있습니다.


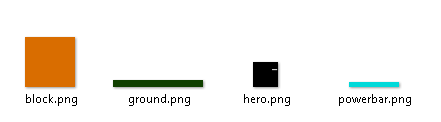
우리 프로젝트 폴더에는 HTML5 구조와 필요한 모든 JavaScript 파일을 포함하는 index.html 파일이 들어 있습니다. 두 가지 하위 폴더가 있습니다. img는 모든 그래픽 애셋을 저장하고 src는 게임의 소스 코드를 저장합니다.


폴더 구조가 어떻게 보이는지는 다음과 같습니다.


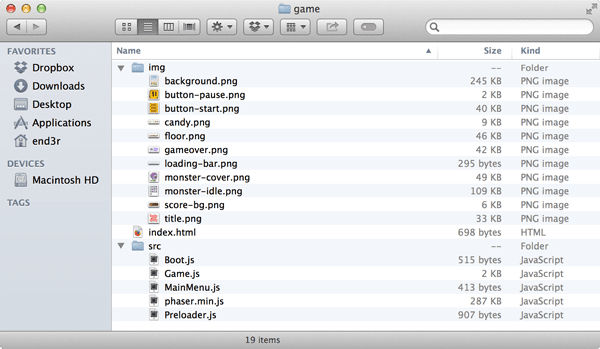
src 폴더에는 JavaScript 파일이 있습니다. 이것은 마술이 일어나는 곳입니다. 이 튜토리얼에서는 그 폴더에있는 모든 파일의 목적과 내용을 설명합니다.


이 튜토리얼의 GitHub 에서 각 파일의 소스를 볼 수 있습니다.


Index.html

index.html 파일부터 시작하겠습니다. 기본 HTML5 웹 사이트처럼 보이지만 텍스트와 많은 HTML 요소를 추가하는 대신, Canvas 요소로 렌더링하는 Phaser 프레임 워크를 초기화합니다.


<!DOCTYPE html>

<html>

<head>

    <meta charset="utf-8" />

    <title>Monster Wants Candy demo</title>

    <style> body { margin: 0; background: #B4D9E7; } </style>

    <script src="src/phaser.min.js"></script>

    <script src="src/Boot.js"></script>

    <script src="src/Preloader.js"></script>

    <script src="src/MainMenu.js"></script>

    <script src="src/Game.js"></script>

</head>

<body>

<script>

(function() {

    var game = new Phaser.Game(640, 960, Phaser.AUTO, 'game');

    game.state.add('Boot', Candy.Boot);

    game.state.add('Preloader', Candy.Preloader);

    game.state.add('MainMenu', Candy.MainMenu);

    game.state.add('Game', Candy.Game);

    game.state.start('Boot');

})();

</script>

</body>

</html>


doctype을 가진 HTML 문서의 일반적인 구조와 <head>의 일부 정보 : charset 인코딩, 페이지 제목 및 CSS 스타일을 정의합니다. 

일반적으로 우리는 모든 스타일을 넣은 외부 CSS 파일을 참조 할 것이지만 여기서는 필요하지 않습니다. 앞에서 언급했듯이 모든 것이 Canvas 요소에 렌더링되므로 스타일을 지정할 HTML 요소가 없습니다. .


마지막으로해야 할 일은 Phaser.min.js 파일에서부터 Phaser 프레임 워크의 소스 코드와 함께 모든 자바 스크립트 파일을 게임의 코드가 포함 된 모든 파일에 포함시키는 것입니다. 모든 자바 스크립트 파일을 하나로 결합하여 브라우저의 요청 수를 줄이는 것이 좋으므로 게임로드가 빨라지지만 이 자습서에서는 별도로 로드 할 것입니다.


<body> 태그의 내용으로 이동하여 프레임 워크를 초기화하고 게임을 시작하십시오. 이 코드는 자체 호출 함수 내에 있습니다. 첫 번째 줄은 다음과 같습니다.

var game = new Phaser.Game(640, 960, Phaser.AUTO, 'game');


이 코드는 몇 가지 기본값으로 페이저를 초기화합니다 :


640은 게임의 캔버스 너비 (픽셀)이고 960은 게임의 높이입니다.


Phaser.AUTO는 Canvas에 게임을 렌더링하는 방법을 프레임 워크에 알려줍니다. 세 가지 옵션이 있습니다 : CANVAS, WEBGL, AUTO. 

첫 번째는 캔버스의 2D 컨텍스트에서 게임을 실행합니다. 

두 번째는 가능한 경우 WebGL을 사용하여 렌더링합니다 (주로 현재 데스크톱이지만 모바일 지원은 개선되고 있습니다). 

세 번째는 WebGL이 지원이되면 WebGL, 그렇지 않으면 2D 캔버스 렌더링이 사용됩니다.


프레임 워크 초기화는 game이라는 단일 객체에 지정되며, Phaser 인스턴스를 참조 할 때 사용하게됩니다.


다음 줄은 게임에 상태를 추가하는 것입니다.

game.state.add('Boot', Candy.Boot);


'Boot'는 상태 이름이고 Candy.Boot는 그 상태를 시작할 때 실행될 객체입니다 (다음 단계에서 정의 됨). 

Boot (구성), Preloader (자산로드), MainMenu (우리 게임의 메인 메뉴) 및 Game (게임의 기본 루프)에 대한 상태를 추가합니다. 

마지막 줄인 game.state.start ( 'Boot')는 Boot 상태를 시작하여 Candy.Boot 객체의 적절한 함수가 실행되도록합니다.


보시다시피, 하나의 주요 자바 스크립트 게임 객체가 만들어졌으며 많은 다른 객체가 특수 목적으로 할당되었습니다. 우리 게임에서는 Boot, Preloader, MainMenu 및 Game 객체가 게임 상태가되며 프로토 타입을 사용하여 정의합니다. 프레임 워크 자체 (preload (), create (), update () 및 render ()) 용으로 예약 된 객체에는 몇 가지 특수 함수 이름이 있지만, 자체 startGame (), spawnCandy managePause ()). 이 모든 것을 잘 이해하지 못한다면 걱정하지 마십시오. 나중에 코드 예제를 사용하여 모든 것을 설명 할 것입니다.


게임

이제 Boot, Preloader 및 MainMenu 상태를 잊어 버리세요. 자세한 내용은 나중에 설명합니다. 부트 상태가 게임의 기본 설정을 처리하고, Preloader가 모든 그래픽 Assets을 로드하며 MainMenu가 게임을 시작할 수 있는 화면을 보여줍니다.


게임 자체에 초점을 맞추고 Gamestate의 코드가 어떻게 되어있는지 봅시다. 전체 Game.js 코드를 살펴보기 전에 개발자의 관점에서 게임 자체의 개념과 로직의 가장 중요한 부분에 대해 이야기 해 봅시다.


세로 모드


이 게임은 세로 모드로 재생됩니다. 즉, 플레이어가 휴대 전화를 세로로 들고 게임을 재생합니다.


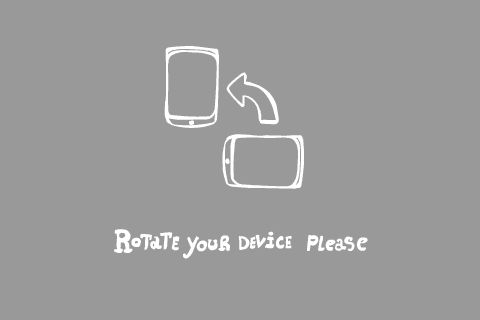
이 모드에서는 화면의 너비가 가로보다 커지는 가로 모드와 달리 화면의 높이가 너비보다 큽니다. 몬스터 원츠 캔디 (Monster Wants Candy)와 같은 세로 모드에서 더 잘 작동하는 게임 종류 (Craigen과 같은 플랫폼 게임 포함) 및 두 모드에서 작동하는 일부 유형이 있습니다. 일반적으로 가로 모드에서 더 잘 작동하는 유형이 있습니다. 그러한 게임을 코드화 하십시오.


Game.js


game.js 파일의 소스 코드를 살펴보기 전에 구조에 대해 이야기 해 보겠습니다. 우리를 위해 창조 된 세계가 있으며, 그 안에는 사탕을 잡는 플레이어 캐릭터가 있습니다.


게임 세계 : 괴물 뒤의 세상은 움직이지 않습니다. 배경에 Candyland의 이미지가 있습니다. 배경에서 괴물을 볼 수 있으며, 사용자 인터페이스도 있습니다.


플레이어 캐릭터 : 이 데모는 매우 간단하고 기본이기 때문에 작은 괴물은 사탕을 기다리는 것 외에는 아무 것도하지 않습니다. 플레이어의 주요 임무는 사탕을 수집하는 것입니다. 
캔디 : 게임의 핵심 메카닉은 최대한 많은 캔디를 잡는 것입니다. 사탕은 화면의 상단 가장자리에서 출현하며, 플레이어는 떨어지는대로 클릭해야 합니다. 사탕이 화면 하단에서 떨어지면 제거되고 플레이어 캐릭터가 손상을 입습니다. 우리는 생명 시스템을 구현하지 않았기 때문에 게임이 즉시 종료되고 적절한 메시지가 표시됩니다.
이제 Game.js 파일의 코드 구조를 살펴 보겠습니다.

Candy.Game = function(game) {

    // ...

};

Candy.Game.prototype = {

    create: function() {

        // ...

    },

    managePause: function() {

        // ...

    },

    update: function() {

        // ...

    }

};

Candy.item = {

    spawnCandy: function(game) {

        // ...

    },

    clickCandy: function(candy) {

        // ...

    },

    removeCandy: function(candy) {

        // ...

    }

};


Candy.Game 프로토 타입에는 다음 세 가지 기능이 정의되어 있습니다.

- create ()는 초기화를 처리합니다.

- managePause ()는 게임을 일시 중지하고 일시 정지 해제합니다.


- update ()는 틱마다 주 게임 루프를 관리합니다.


하나의 캔디를 나타내는 item이라는 편리한 객체를 만들 것입니다. 다음과 같은 유용한 함수가 있습니다.

- spawnCandy ()는 게임 세계에 새로운 캔디를 추가합니다.

- clickCandy ()는 사용자가 캔디를 클릭하거나 탭하면 시작됩니다.

- removeCandy ()는 그것을 제거합니다.


다음 코드를 봅시다.

Candy.Game = function(game) {

    this._player = null;

    this._candyGroup = null;

    this._spawnCandyTimer = 0;

    this._fontStyle = null;

    Candy._scoreText = null;

    Candy._score = 0;

    Candy._health = 0;

};


여기서 우리는 나중에 코드에서 사용할 모든 변수를 설정하고 있습니다.


this._name을 정의함으로써, 변수의 사용을 Candy.Game 범위로 제한합니다. 즉, 다른 상태에서는 사용할 수 없다는 의미입니다. 즉, 필요하지 않으므로 왜 노출합니까?


Candy._name을 정의하면 다른 상태 및 객체에서 이러한 변수를 사용할 수 있으므로 예를 들어 Candy._score를 Candy.item.clickCandy () 함수에서 사용 수 있습니다.


객체는 null로 초기화되고 계산에 필요한 변수는 0으로 초기화됩니다.


Candy.Game.prototype의 내용으로 이동해서:

create: function() {

    this.physics.startSystem(Phaser.Physics.ARCADE);

    this.physics.arcade.gravity.y = 200;


    this.add.sprite(0, 0, 'background');

    this.add.sprite(-30, Candy.GAME_HEIGHT-160, 'floor');

    this.add.sprite(10, 5, 'score-bg');

    this.add.button(Candy.GAME_WIDTH-96-10, 5, 'button-pause', this.managePause, this);


    this._player = this.add.sprite(5, 760, 'monster-idle');

    this._player.animations.add('idle', [0,1,2,3,4,5,6,7,8,9,10,11,12], 10, true);

    this._player.animations.play('idle');


    this._spawnCandyTimer = 0;

    Candy._health = 10;


    this._fontStyle = { font: "40px Arial", fill: "#FFCC00", stroke: "#333", strokeThickness: 5, align: "center" };

    Candy._scoreText = this.add.text(120, 20, "0", this._fontStyle);


    this._candyGroup = this.add.group();

    Candy.item.spawnCandy(this);


},


create () 함수의 시작 부분에서 우리는 ARCADE 물리 시스템을 설정했습니다. Phaser에서는 몇 가지가 있지만 가장 간단한 방법입니다. 그 후, 게임에 수직 중력을 추가합니다. 그런 다음 배경, 괴물이 서있는 바닥 및 점수 UI 배경을 추가합니다. 우리가 추가하는 네 번째 항목은 일시 중지 버튼입니다. Candy.Preloader ()에 정의되어 있지만 게임 코드 전체에서 사용할 수있는 Candy.GAME_WIDTH 및 Candy.GAME_HEIGHT 변수를 사용하고 있습니다.


그런 다음 플레이어의 아바타 인 괴물을 만듭니다. 프레임 있는 스프라이트 (스프라이트 시트)입니다. 그가 침착하게 서 있고 호흡하는 것처럼 보이게하려면, 우리는 그를 움직일 수 있습니다.


animations.add () 함수는 사용 가능한 프레임에서 애니메이션을 만들고 함수는 다음 네 개의 매개 변수를 사용합니다.

- 애니메이션의 이름 (나중에 참조 할 수 있습니다)

- 우리가 사용하고자 하는 모든 프레임이 있는 테이블 (우리가 원하는 경우에만 사용할 수 있습니다)

- 프레임 속도

- 애니메이션을 반복하여 무한정 재생할지 여부를 지정하는 플래그.

애니메이션을 시작하려면 animations.play () 함수를 지정된 이름으로 사용해야합니다.


그런 다음 spawnCandyTimer를 0 (카운트 준비)으로 설정하고 괴물의 상태를 10으로 설정합니다.


텍스트 스타일 지정하기

다음 두 줄은 화면에 텍스트를 보여줍니다. this.add.text () 함수는 네 개의 매개 변수를 사용합니다. 

화면의 왼쪽 및 위쪽 절대 위치, 실제 텍스트 문자열 및 config 객체입니다. config 객체의 CSS와 유사한 구문을 사용하여 텍스트 서식을 지정할 수 있습니다.


우리 글꼴의 설정은 다음과 같습니다.

this._fontStyle = { 

    font: "40px Arial", 

    fill: "#FFCC00", 

    stroke: "#333", 

    strokeThickness: 5, 

    align: "center"


};


이 경우 글꼴은 Arial, 높이가 40 픽셀, 색상이 노란색, 획이 정의되어 있습니다 (색상 및 두께). 텍스트는 가운데 맞춤입니다.


그런 다음 candyGroup을 정의하고 첫 번째 캔디를 생성합니다.


게임 일시 중지


일시 중지 기능은 다음과 같습니다.

managePause: function() {

    this.game.paused = true;

    var pausedText = this.add.text(100, 250, "Game paused.\nTap anywhere to continue.", this._fontStyle);

    this.input.onDown.add(function(){

        pausedText.destroy();

        this.game.paused = false;

    }, this);


},


일시 중지 버튼을 클릭 할 때마다 this.game.paused의 상태를 true로 변경하고, 해당 프롬프트를 플레이어에 표시하고, 플레이어의 클릭 또는 화면의 탭에 대한 이벤트 리스너를 설정합니다. 해당 클릭 또는 탭이 감지되면 텍스트를 제거하고 this.game.paused를 false로 설정합니다.


게임 개체의 일시 중지 된 변수는 게임에서 애니메이션이나 계산을 중지하기 때문에 Phaser에서 특별하므로 게임을 일시 중지 할 때까지 모든 것이 고정되어 false로 설정됩니다.


업데이트 루프


update () 함수 이름은 Phaser의 예약어 중 하나입니다. 그 이름을 가진 함수를 작성할 때, 그것은 게임의 모든 프레임에서 실행될 것입니다. 다양한 조건에 따라 계산을 관리 할 수 있습니다.

update: function() {

    this._spawnCandyTimer += this.time.elapsed;

    if(this._spawnCandyTimer > 1000) {

        this._spawnCandyTimer = 0;

        Candy.item.spawnCandy(this);

    }

    this._candyGroup.forEach(function(candy){

        candy.angle += candy.rotateMe;

    });

    if(!Candy._health) {

        this.add.sprite((Candy.GAME_WIDTH-594)/2, (Candy.GAME_HEIGHT-271)/2, 'game-over');

        this.game.paused = true;

    }

}

게임 세계의 모든 틱은 이전 틱 이후 경과 된 시간을 spawnCandyTimer 변수에 추가하여 추적합니다. if 문은 타이머를 재설정하고 게임 세계에 새 캔디를 스폰 할 시간인지 여부를 확인합니다. 

매 초마다 이렇게 처리합니다 (즉, spawnCandyTimer가 1000 밀리 초를 경과 할 때마다). 그런 다음 forEach를 사용하여 내부에있는 모든 캔디 객체가있는 캔디 그룹을 반복합니다.

캔디의 angle 변수에 추가합니다(캔디 객체의 rotateMe 값에 저장 됨). 그들은 떨어지는 동안 각각이 고정 된 속도로 회전합니다. 마지막으로 생명 상태가 0으로 떨어졌는지 확인하고, 0이면 화면 위에 게임오버을 표시하고 게임을 일시 중지합니다.


캔디 이벤트 관리


캔디 로직을 메인 게임과 분리하기 위해 우리는 spawnCandy (), clickCandy () 및 removeCandy ()와 같은 함수를 포함하는 item이라는 객체를 사용합니다. 사탕과 관련된 변수 중 일부는 Game 개체에 사용하기 쉽도록 유지하는 반면 다른 항목은 더 나은 유지 관리를 위해 항목 기능에만 정의됩니다.

spawnCandy: function() {

    var dropPos = Math.floor(Math.random()*Candy.GAME_WIDTH);

    var dropOffset = [-27,-36,-36,-38,-48];

    var candyType = Math.floor(Math.random()*5);

    var candy = game.add.sprite(dropPos, dropOffset[candyType], 'candy');

    candy.animations.add('anim', [candyType], 10, true);

    candy.animations.play('anim');


    game.physics.enable(candy, Phaser.Physics.ARCADE);

    candy.inputEnabled = true;

    candy.events.onInputDown.add(this.clickCandy, this);


    candy.checkWorldBounds = true;

    candy.events.onOutOfBounds.add(this.removeCandy, this);

    candy.anchor.setTo(0.5, 0.5);

    candy.rotateMe = (Math.random()*4)-2;

    game._candyGroup.add(candy);


},

이 함수는 세 가지 값을 정의하여 시작합니다.

- 캔디를 떨어 뜨리는 랜덤 화 된 x 좌표 (캔버스의 너비와 너비 사이)

- 높이 (우리는 사탕의 유형에 따라 나중에 결정 함)에 따라 사탕을 떨어 뜨리는 y 좌표,


- 무작위로 추출한 캔디 유형 (우리는 다섯 가지 다른 이미지를 사용합니다)


그런 다음, 위에서 정의한 시작 위치와 이미지를 사용하여 하나의 캔디를 스프라이트로 추가합니다. 이 블록에서 마지막으로 수행 할 작업은 캔디가 생성 될 때 사용할 새 애니메이션 프레임을 설정하는 것입니다.


다음으로 중력이 설정되면 화면 상단에서 자연스럽게 떨어질 수 있도록 물리 엔진 용 캔디 바디를 활성화합니다. 그런 다음 캔디의 클릭작업에 대한 이벤트 리스너를 설정합니다.


캔디가 화면 경계를 벗어날 때 이벤트를 발생 시키도록하려면 checkWorldBounds를 true로 설정하십시오. events.onOutOfBounds ()는 캔디가 화면을 벗어날때 호출 될 함수입니다. 그리고 removeCandy ()를 호출하도록합니다. 정확히 중간에 캔디에 앵커를 설정하여 축 주위로 앵커를 회전시켜 자연스럽게 회전합니다. 우리는 rotateMe 변수를 여기에 설정하여 update () 루프에서 이를 변경하면 사탕을 회전시킬 수 있습니다. -2와 +2 사이의 값을 선택합니다. 마지막 줄은 우리가 새로 만든 사탕을 캔디 그룹에 추가하여 모든 것을 반복 할 수 있도록합니다.


다음 함수 인 clickCandy ()로 넘어 갑시다.

clickCandy: function(candy) {

    candy.kill();

    Candy._score += 1;

    Candy._scoreText.setText(Candy._score);


},


하나의 캔디를 매개 변수로 사용하고 Phaser 메소드 kill ()을 사용하여 제거합니다. 또한 점수를 1 씩 늘리고 점수 텍스트를 업데이트합니다.


사탕을 재설정하는 것은 짧고 쉽습니다.

removeCandy: function(candy) {

    candy.kill();

    Candy._health -= 10;


},


캔디가 클릭되지 않고 화면 아래에 사라지면 removeCandy () 함수가 시작됩니다. 캔디 오브젝트가 제거되고 플레이어의 체력이 10만큼 감소합니다. (그는 처음에는 10 점이 있었기 때문에 떨어지는 캔디 한 점을 잃어 버리더라도 게임이 끝납니다.)


프로토 타입 및 게임 상태

게임 메커닉, 핵심 아이디어 및 게임 플레이의 모습에 대해 배웠습니다. 이제 화면의 크기 조정, 에셋로드, 버튼 누르기 관리 등 코드의 다른 부분을 볼 차례입니다.


우리는 이미 게임 상태에 대해 알고 있습니다. 그래서 게임의 상태를 정확히 보도록하겠습니다.


Boot.js


Boot.js는 게임 객체를 정의하는 JavaScript 파일입니다.

Boot.js 파일의 소스 코드는 다음과 같습니다.

var Candy = {};

Candy.Boot = function(game) {};

Candy.Boot.prototype = {

    preload: function() {

        this.load.image('preloaderBar', 'img/loading-bar.png');

    },

    create: function() {

        this.input.maxPointers = 1;

        this.scale.scaleMode = Phaser.ScaleManager.SHOW_ALL;

        this.scale.pageAlignHorizontally = true;

        this.scale.pageAlignVertically = true;

        this.scale.setScreenSize(true);

        this.state.start('Preloader');

    }


};


보시다시피, 우리는 게임을 위한 전역 객체를 생성하는 var Candy = {}로 시작하였습니다. 모든 것이 내부에 저장되므로 전역 네임 스페이스를 부 풀리지 않을 것입니다.


Candy.Boot = function (game) {}은 게임 객체를 매개 변수 (index.html의 프레임 워크로도 생성)로 받는 Boot ()라는 새로운 함수를 만듭니다 (index.html에서 사용됨).


Candy.Boot.prototype = {} 코드는 프로토 타입을 사용하여 Candy.Boot의 내용을 정의하는 방법입니다.

Candy.Boot.prototype = {

    preload: function() {

        // code

    },

    create: function() {

        // code

    }

};


앞에서 언급했듯이 Phaser의 기능에는 몇 가지 예약 된 이름이 있습니다. preload () 및 create ()는 두 가지입니다. preload ()는 모든 에셋을 로드하는 데 사용되며 create ()는 정확히 한 번 (preload () 후) 호출되므로 변수 정의 또는 스프라이트 추가와 같이 객체의 설정으로 사용될 코드를 배치 할 수 있습니다 .


우리의 Boot 객체에는 이 두 함수가 포함되어 있으므로 Candy.Boot.preload () 및 Candy.Boot.create ()를 각각 사용하여 참조 할 수 있습니다. Preload () 함수는 Boot.js 파일의 전체 소스 코드에서 볼 수 있듯이 프리 로더 이미지를 프레임 워크에 로드합니다.

preload: function() {

    this.load.image('preloaderBar', 'img/loading-bar.png');


},


this.load.image ()의 첫 번째 매개 변수는 로딩 바 이미지에 지정한 이름이고 두 번째 매개 변수는 프로젝트 구조의 이미지 파일에 대한 경로입니다.


Preload.js 파일에서 로드되는 다른 모든 이미지의 상태를 표시하는 로드바 이미지가 필요합니다. 그러므로 Boot.js에서 다른 모든 이미지보다 먼저 로드해야합니다.


비율 옵션

create () 함수는 입력 및 크기 조정을 위한 몇 가지 Phaser 설정을 포함합니다.

create: function() {

    this.input.maxPointers = 1;

    this.scale.scaleMode = Phaser.ScaleManager.SHOW_ALL;

    this.scale.pageAlignHorizontally = true;

    this.scale.pageAlignVertically = true;

    this.scale.setScreenSize(true);

    this.state.start('Preloader');


}

input.maxPointers를 1로 설정하는 첫 번째 줄은 우리가 게임에서 필요로 하지 않기 때문에 멀티 터치를 사용하지 않을 것을 정의합니다.


scale.scaleMode 설정은 게임의 스케일링을 제어합니다. 사용 가능한 옵션은 EXACT_FIT, NO_SCALE 및 SHOW_ALL입니다. 그것들을 열거 해, 각각 0, 1, 또는 2의 값을 사용할 수 있습니다. 

첫 번째 옵션은 사용 가능한 모든 공간 (100 % 너비와 높이, 보존 비율 없음)으로 게임의 크기를 조정합니다. 

두 번째는 스케일링을 완전히 비활성화합니다. 

세 번째 플레이어는 게임이 주어진 차원에 맞는지 확인하지만 단편을 숨기지 않고 모든 내용이 화면에 표시됩니다 (비율은 그대로 유지됩니다).


scale.pageAlignHorizontally 및 scale.pageAlignVertically를 true로 설정하면 게임이 가로 및 세로로 정렬되므로 Canvas 요소의 왼쪽과 오른쪽에 같은 양의 여유 공간이 생깁니다. 상단과 하단도 동일합니다.


scale.setScreenSize (true)를 호출하면 크기 조절이 "활성화"됩니다.


마지막 줄인 state.start ( 'Preloader')는 다음 상태 (이 경우 Preloader 상태)를 실행합니다.


Preloader.js


방금 진행 한 Boot.js 파일에는 간단한 (한 줄짜리) preload () 함수와 create () 함수에 많은 코드가 있지만 Preloader.js는 완전히 다른 것처럼 보입니다. create () 함수는 모든 에셋이 로드 될 때 다른 상태로 이동하는 데 사용됩니다.


Preloader.js 파일의 코드는 다음과 같습니다.

Candy.Preloader = function(game){

    Candy.GAME_WIDTH = 640;

    Candy.GAME_HEIGHT = 960;

};


Candy.Preloader.prototype = {

    preload: function() {

        this.stage.backgroundColor = '#B4D9E7';

        this.preloadBar = this.add.sprite((Candy.GAME_WIDTH-311)/2,

            (Candy.GAME_HEIGHT-27)/2, 'preloaderBar');

        this.load.setPreloadSprite(this.preloadBar);


        this.load.image('background', 'img/background.png');

        this.load.image('floor', 'img/floor.png');

        this.load.image('monster-cover', 'img/monster-cover.png');

        this.load.image('title', 'img/title.png');

        this.load.image('game-over', 'img/gameover.png');

        this.load.image('score-bg', 'img/score-bg.png');

        this.load.image('button-pause', 'img/button-pause.png');


        this.load.spritesheet('candy', 'img/candy.png', 82, 98);

        this.load.spritesheet('monster-idle',

            'img/monster-idle.png', 103, 131);

        this.load.spritesheet('button-start',

            'img/button-start.png', 401, 143);

    },

    create: function() {

        this.state.start('MainMenu');

    }


};


이전 Boot.js 파일과 유사하게 시작됩니다. Preloader 객체를 정의하고 프로토 타입에 두 개의 함수 (preload () 및 create ())에 대한 정의를 추가합니다. Prototype 객체 안에는 두 개의 변수 인 Candy.GAME_WIDTH와 Candy.GAME_HEIGHT가 정의되어 있습니다. 이것들은 게임 화면의 기본 너비와 높이를 설정합니다. 이 너비와 높이는 코드의 다른 곳에서 사용될 것입니다.


preload () 함수의 처음 세 줄은 스테이지의 배경색을 설정하고 (# B4D9E7, 하늘색), 게임의 스프라이트를 표시하고, setPreloadSprite라는 특수 함수의 기본 색상으로 정의합니다 ) 이미지로딩 진행 상태를 나타냅니다.


add.sprite () 함수를 살펴 보겠습니다.

this.preloadBar = this.add.sprite((640-311)/2, (960-27)/2, 'preloaderBar');


보시다시피 세 가지 값을 전달합니다. 이미지의 절대 왼쪽 위치 (화면의 중심은 스테이지의 너비에서 이미지의 너비를 빼고 결과를 반으로 나눔으로써 얻습니다.), 이미지의 절대 상단 위치 (비슷하게 계산 된), 이미지의 이름 (Boot.js 파일에 이미로드 된 이미지의 이름).


스프라이트 시트로드 중

다음 몇 줄은 load.image () (이미 보았 듯이)를 사용하여 모든 그래픽 애셋을 게임에 로드하는 것입니다.


마지막 3 가지는 약간 다릅니다.

this.load.spritesheet('candy', 'img/candy.png', 82, 98);


단일 이미지를 로드하는 대신 load.spritesheet () 함수는 하나의 파일 (스프라이트 시트) 내의 이미지 전체를 관리합니다. 스프라이트에서 단일 이미지의 크기를 함수에 알리기 위해 두 개의 추가 매개 변수가 필요합니다.


이 경우 하나의 candy.png 파일 안에 5 가지 유형의 사탕이 있습니다. 전체 이미지는 410x98px이지만 단일 항목은 82x98px로 설정되어 load.spritesheet () 함수에 입력됩니다. 플레이어 스프라이트 시트도 비슷한 방식으로 로드됩니다.


두 번째 함수 인 create ()는 게임의 다음 상태 인 MainMenu를 시작합니다. 즉, preload () 함수의 모든 이미지가 로드 된 직후에 게임의 기본 메뉴가 표시됩니다.


MainMenu.js


이 파일은 게임 관련 이미지를 렌더링하는 곳이며, 사용자가 시작 버튼을 클릭하여 게임 루프를 시작하고 게임을하는 곳입니다.


Candy.MainMenu = function(game) {};

Candy.MainMenu.prototype = {

    create: function() {

        this.add.sprite(0, 0, 'background');

        this.add.sprite(-130, Candy.GAME_HEIGHT-514, 'monster-cover');

        this.add.sprite((Candy.GAME_WIDTH-395)/2, 60, 'title');

        this.add.button(Candy.GAME_WIDTH-401-10, Candy.GAME_HEIGHT-143-10,

            'button-start', this.startGame, this, 1, 0, 2);

    },

    startGame: function() {

        this.state.start('Game');

    }


};

구조는 이전 JavaScript 파일과 유사합니다. MainMenu 객체의 프로토 타입에는 preload () 함수가 없습니다. 모든 이미지가 이미 Preload.js 파일에서 로드되었기 때문입니다.


프로토 타입에는 create () 와 startGame ()이라는 두 가지 함수가 정의되어 있습니다. 앞에서 언급했듯이, 첫 번째 이름은 Phaser에만 국한되며 두 번째 이름은 우리 자신의 이름입니다.


startGame ()을 먼저 살펴 보겠습니다.

startGame: function() {

    this.state.start('Game');


}

이 함수는 게임 루프를 시작하는 것만을 처리하지만 자동으로 또는 애셋이로드 된 후에 실행되지 않습니다. 버턴에 할당하고 사용자 입력을 기다립니다.


create: function() {

    this.add.sprite(0, 0, 'background');

    this.add.sprite(-130, Candy.GAME_HEIGHT-514, 'monster-cover');

    this.add.sprite((Candy.GAME_WIDTH-395)/2, 60, 'title');

    this.add.button(Candy.GAME_WIDTH-401-10, Candy.GAME_HEIGHT-143-10,

        'button-start', this.startGame, this, 1, 0, 2);


},

create () 메소드는 우리가 이미 잘 알고 있는 3 개의 add.sprite () Phaser 함수를 가지고 있습니다 : 이미지를 절대 위치에 배치하여 보이는 스테이지에 이미지를 추가합니다. 

우리의 메인 메뉴는 배경, 모서리에있는 작은 괴물, 그리고 게임의 제목을 포함합니다.


버튼

Game 상태에서 이미 사용했던 객체도 있습니다.

this.startButton = this.add.button(Candy.GAME_WIDTH-401-10, Candy.GAME_HEIGHT-143-10,


    'button-start', this.startGame, this, 1, 0, 2);

이 버튼은 지금까지 보아 왔던 방법보다 훨씬 복잡해 보입니다. 

왼쪽 위치, 위쪽 위치, 이미지 (또는 스프라이트)의 이름, 버튼을 클릭 한 후 실행할 함수, 이 함수가 실행되는 컨텍스트 및 이미지의 인덱스를 만들기 위해 8 개의 다른 인수를 전달합니다.


다음은 버튼 스프라이트 시트가 표시되는 상태로 레이블이 지정된 상태입니다.


이것은 이전에 사용한 candy.png 스프라이트 시트와 매우 유사합니다.


함수에 전달되는 된 마지막 세 자리는 오버 (호버), 아웃 (일반) 및 다운 (터치 / 클릭)과 같은 버튼의 여러 상태임을 기억하는 것이 중요합니다. 

우리는 button.png 스프라이트 시트에서 normal, hover 및 click 상태를 각각 가지므로 add.button () 함수의 전달되는 순서를 0, 1, 2에서 1, 0, 2로 변경하여야 합니다.


이제 Phaser 게임 프레임 워크의 기본 사항을 알게되었습니다.


완성 된 게임

이 문서에서 사용 된 데모 게임은 여기서 플레이 할 수있는 완성 된 게임으로 발전했습니다. 보시다시피 생명, 업적, 높은 점수 및 기타 흥미로운 기능이 구현되었지만 대부분이 튜토리얼을 통해 배웠던 지식을 기반으로 합니다.


마치며

지금까지 Monster Wants Candy 데모의 모든 코드 행을 통한 긴 여행 이었지만 Phaser를 배우는 데 도움이되기를 바랍니다. 가까운 장래에 프레임 워크를 사용하여 멋진 게임을 만들 수 있기를 바랍니다.

Posted by 마스터킹
|

이제는 Phaser 프레임 워크에서 HTML5를 사용하여 "2048" 게임을 할 차례입니다.

트윈과 애니메이션을 만드는 것은 매우 쉽습니다. 그래서 여기에 "2048" 게임이 있습니다:

WASD 키로 플레이하고 2048 또는 그 이상으로가보십시오 !!


소스 코드를 보기 전에 흰색 PNG 이미지 만 사용하고 게임 필드 값을 1 차원 배열에 저장하고 있음을 기억하십시오.


이 스크립트를 공부하면 다음 10 가지 원칙을 배우게됩니다.


* 그래픽 애셋로드

* 스프라이트 만들기

* 텍스트를 작성하고 스타일을 지정

* 독립형 Sprite 또는 기존 Sprite의 자식으로 Sprite를 스테이지에 추가하고 제거

* 그룹 만들기

* 그룹을 통해 정렬 및 반복

* 키보드 입력 처리

* 트윈을 사용하여 애니메이션 만들기

* 콜백 관리

* 스프라이트에 색상 필터 적용


<!doctype html>

<html>

<head>

     <script src="phaser.min.js"></script>

     <style>

     body{margin:0}

     </style>

     <script type="text/javascript">

window.onload = function() {

                    // tile width, in pixels

var tileSize = 100;

// creation of a new phaser game, with a proper width and height according to tile

// size

var game = new Phaser.Game(tileSize*4,tileSize*4,Phaser.CANVAS,"",

{preload:onPreload, create:onCreate});

// game array, starts with all cells to zero

var fieldArray = new Array(0,0,0,0,0,0,0,0,0,0,0,0,0,0,0,0);

// this is the group which will contain all tile sprites

var tileSprites;

// variables to handle keyboard input

var upKey;

var downKey;

var leftKey;

var rightKey;

// colors to tint tiles according to their value

var colors = {

2:0xFFFFFF,

4:0xFFEEEE,

8:0xFFDDDD,

16:0xFFCCCC,

32:0xFFBBBB,

64:0xFFAAAA,

128:0xFF9999,

256:0xFF8888,

512:0xFF7777,

1024:0xFF6666,

2048:0xFF5555,

4096:0xFF4444,

8192:0xFF3333,

16384:0xFF2222,

32768:0xFF1111,

65536:0xFF0000

}

// at the beginning of the game, the player cannot move

                    var canMove=false;

// THE GAME IS PRELOADING

function onPreload() {

// preload the only image we are using in the game

game.load.image("tile", "tile.png");

}

// THE GAME HAS BEEN CREATED

function onCreate() {

// listeners for WASD keys

upKey = game.input.keyboard.addKey(Phaser.Keyboard.W);

upKey.onDown.add(moveUp,this);

     downKey = game.input.keyboard.addKey(Phaser.Keyboard.S);

     downKey.onDown.add(moveDown,this);

     leftKey = game.input.keyboard.addKey(Phaser.Keyboard.A);

     leftKey.onDown.add(moveLeft,this);

     rightKey = game.input.keyboard.addKey(Phaser.Keyboard.D);

     rightKey.onDown.add(moveRight,this);

     // sprite group declaration

tileSprites = game.add.group();

     // at the beginning of the game we add two "2"

addTwo();

addTwo();

}

// A NEW "2" IS ADDED TO THE GAME

function addTwo(){

// choosing an empty tile in the field

do{

var randomValue = Math.floor(Math.random()*16);

} while (fieldArray[randomValue]!=0)

// such empty tile now takes "2" value

fieldArray[randomValue]=2;

// creation of a new sprite with "tile" instance, that is "tile.png" we loaded

// before

var tile = game.add.sprite(toCol(randomValue)*tileSize,toRow(randomValue)*

tileSize,"tile");

// creation of a custom property "pos" and assigning it the index of the

// newly added "2"

tile.pos = randomValue;

// at the beginning the tile is completely transparent

tile.alpha=0;

// creation of a text which will represent the value of the tile

var text = game.add.text(tileSize/2,tileSize/2,"2",{font:"bold 16px Arial",

align:"center"});

                         // setting text anchor in the horizontal and vertical center

text.anchor.set(0.5);

// adding the text as a child of tile sprite

tile.addChild(text);

// adding tile sprites to the group

tileSprites.add(tile);

// creation of a new tween for the tile sprite

var fadeIn = game.add.tween(tile);

// the tween will make the sprite completely opaque in 250 milliseconds

fadeIn.to({alpha:1},250);

// tween callback

fadeIn.onComplete.add(function(){

// updating tile numbers. This is not necessary the 1st time, anyway

updateNumbers();

// now I can move

canMove=true;

})

// starting the tween

fadeIn.start();

}

// GIVING A NUMBER IN A 1-DIMENSION ARRAY, RETURNS THE ROW

function toRow(n){

return Math.floor(n/4);

}

// GIVING A NUMBER IN A 1-DIMENSION ARRAY, RETURNS THE COLUMN

function toCol(n){

return n%4;

}

// THIS FUNCTION UPDATES THE NUMBER AND COLOR IN EACH TILE

function updateNumbers(){

// look how I loop through all tiles

tileSprites.forEach(function(item){

// retrieving the proper value to show

var value = fieldArray[item.pos];

// showing the value

item.getChildAt(0).text=value;

// tinting the tile

item.tint=colors[value]

});

}

// MOVING TILES LEFT

function moveLeft(){

// Is the player allowed to move?

                         if(canMove){

                         // the player can move, let's set "canMove" to false to prevent moving again

// until the move process is done

                              canMove=false;

                              // keeping track if the player moved, i.e. if it's a legal move

                              var moved = false;

                              // look how I can sort a group ordering it by a property

     tileSprites.sort("x",Phaser.Group.SORT_ASCENDING);

     // looping through each element in the group

     tileSprites.forEach(function(item){

     // getting row and column starting from a one-dimensional array

     var row = toRow(item.pos);

     var col = toCol(item.pos);

     // checking if we aren't already on the leftmost column (the tile can't

// move)

     if(col>0){

     // setting a "remove" flag to false. Sometimes you have to

// remove tiles, when two merge into one

     var remove = false;

     // looping from column position back to the leftmost column

     for(i=col-1;i>=0;i--){

     // if we find a tile which is not empty, our search is

// about to end...

     if(fieldArray[row*4+i]!=0){

     // ...we just have to see if the tile we are landing

// on has the same value of the tile we are moving

     if(fieldArray[row*4+i]==fieldArray[row*4+col]){

     // in this case the current tile will be removed

     remove = true;

     i--;                                            

     }

     break;

     }

     }

     // if we can actually move...

     if(col!=i+1){

     // set moved to true

                                             moved=true;

                                             // moving the tile "item" from row*4+col to row*4+i+1 and (if allowed)

// remove it

                                             moveTile(item,row*4+col,row*4+i+1,remove);

     }

     }

     });

     // completing the move

     endMove(moved);

                         }

}

// FUNCTION TO COMPLETE THE MOVE AND PLACE ANOTHER "2" IF WE CAN

function endMove(m){

// if we move the tile...

if(m){

// add another "2"

     addTwo();

                         }

                         else{

                         // otherwise just let the player be able to move again

canMove=true;

}

}

// FUNCTION TO MOVE A TILE

function moveTile(tile,from,to,remove){

// first, we update the array with new values

                         fieldArray[to]=fieldArray[from];

                         fieldArray[from]=0;

                         tile.pos=to;

                         // then we create a tween

                         var movement = game.add.tween(tile);

                         movement.to({x:tileSize*(toCol(to)),y:tileSize*(toRow(to))},150);

                         if(remove){

                         // if the tile has to be removed, it means the destination tile must be multiplied by 2

                              fieldArray[to]*=2;

                              // at the end of the tween we must destroy the tile

                              movement.onComplete.add(function(){

                                   tile.destroy();

                              });

                         }

                         // let the tween begin!

                         movement.start();

                    }


                    // MOVING TILES UP - SAME PRINCIPLES AS BEFORE

                    function moveUp(){

                          if(canMove){

                              canMove=false;

                              var moved=false;

     tileSprites.sort("y",Phaser.Group.SORT_ASCENDING);

     tileSprites.forEach(function(item){

     var row = toRow(item.pos);

     var col = toCol(item.pos);

     if(row>0){  

                                        var remove=false;

     for(i=row-1;i>=0;i--){

     if(fieldArray[i*4+col]!=0){

     if(fieldArray[i*4+col]==fieldArray[row*4+col]){

     remove = true;

     i--;                                            

     }

                                                  break

     }

     }

     if(row!=i+1){

                                             moved=true;

                                             moveTile(item,row*4+col,(i+1)*4+col,remove);

     }

     }

     });

     endMove(moved);

                         }

}

// MOVING TILES RIGHT - SAME PRINCIPLES AS BEFORE

                    function moveRight(){

                          if(canMove){

                              canMove=false;

                              var moved=false;

     tileSprites.sort("x",Phaser.Group.SORT_DESCENDING);

     tileSprites.forEach(function(item){

     var row = toRow(item.pos);

     var col = toCol(item.pos);

     if(col<3){

                                        var remove = false;

     for(i=col+1;i<=3;i++){

     if(fieldArray[row*4+i]!=0){

                                                  if(fieldArray[row*4+i]==fieldArray[row*4+col]){

     remove = true;

     i++;                                            

     }

     break

     }

     }

     if(col!=i-1){

                                             moved=true;

     moveTile(item,row*4+col,row*4+i-1,remove);

     }

     }

     });

     endMove(moved);

                         }

}


                    // MOVING TILES DOWN - SAME PRINCIPLES AS BEFORE

                    function moveDown(){

                          if(canMove){

                              canMove=false;

                              var moved=false;

     tileSprites.sort("y",Phaser.Group.SORT_DESCENDING);

     tileSprites.forEach(function(item){

     var row = toRow(item.pos);

     var col = toCol(item.pos);

     if(row<3){

                                        var remove = false;

     for(i=row+1;i<=3;i++){

     if(fieldArray[i*4+col]!=0){

     if(fieldArray[i*4+col]==fieldArray[row*4+col]){

     remove = true;

     i++;                                            

     }

                                                  break

     }

     }

     if(row!=i-1){

                                             moved=true;

     moveTile(item,row*4+col,(i-1)*4+col,remove);

     }

     }

     });

          endMove(moved);

                         }

}

     };

</script>

    </head>

    <body>

    </body>

</html>


소스파일입니다.


Posted by 마스터킹
|

Roguelikes는 Dredmor의 Dungeons, Spelunky, Isaac의 바인딩, FTL이 광범위한 잠재 고객에게 도달하고 비평을 받고있는 게임과 함께 최근 주목을 받아 왔습니다. 작은 틈새 시장에서 하드 코어 플레이어가 오래 동안 즐기던 다양한 조합의 rockguelike 요소는 이제 많은 기존 장르에 깊이와 재연성을 가져다줍니다.


이 튜토리얼에서는 JavaScript와 HTML 5 게임 엔진 인 Phaser를 사용하여 전통적인 RogueLike 게임을 만드는 법을 배웁니다. 결국, 당신은 당신의 브라우저에서 재생할 수있는, 완벽한 기능을 갖춘 간단한 RogueLike 게임을 갖게 될 것입니다! (우리의 목적을 위해 전통적인 roguelike는 permadeath와 함께 싱글 플레이어, 무작위, 차례 기반 던전 크롤러로 정의됩니다.)


준비하기

이 자습서에서는 텍스트 편집기와 브라우저가 필요합니다. 나는 Notepad ++를 사용하고 있으며 광범위한 개발자 도구를 위해 Chrome을 선호하지만 워크 플로우는 선택한 텍스트 편집기와 브라우저에서 거의 동일합니다.


그런 다음 소스 파일을 다운로드 하고 init 폴더로 시작해야합니다. 여기에는 게임용 Phaser와 기본 HTML 및 JS 파일이 포함되어 있습니다. 현재 비어있는 rl.js 파일에 게임 코드를 씁니다.


index.html 파일은 단순히 Phaser와 앞서 언급 한 게임 코드 파일을로드합니다.

<!DOCTYPE html>

<head>

    <title>roguelike tutorial</title>

    <script src="phaser.min.js"></script>

    <script src="rl.js"></script>

</head>

</html>


초기화 및 정의

당분간은 ASCII 그래픽을 사용하게 될 것입니다. 미래에는 비트 맵 그래픽으로 바꿀 수 있지만, 지금은 간단한 ASCII를 사용하면 더 쉽게 사용할 수 있습니다.


폰트 크기, 맵의 크기 (즉, 레벨), 그리고 스폰자의 수에 대한 몇 가지 상수를 정의 해 보겠습니다.

// font size

var FONT = 32; 

// map dimensions

var ROWS = 10;

var COLS = 15;

// number of actors per level, including player

var ACTORS = 10;


Phaser를 초기화하고 키보드 키 업 이벤트를 설정해 봅시다. 

// initialize phaser, call create() once done

var game = new Phaser.Game(COLS * FONT * 0.6, ROWS * FONT, Phaser.AUTO, null, {

        create: create

});


function create() {

        // init keyboard commands

        game.input.keyboard.addCallbacks(null, null, onKeyUp);

}


function onKeyUp(event) {

        switch (event.keyCode) {

                case Keyboard.LEFT: 

                case Keyboard.RIGHT: 

                case Keyboard.UP:

                case Keyboard.DOWN:

        }

}


기본 모노 스페이스 글꼴은 높이가 60 % 정도되는 경향이 있으므로 캔버스 크기를 0.6 * 글꼴 크기 * 열 수로 초기화했습니다. 우리는 또한 Phaser에게 초기화가 끝난 직후에 create () 함수를 호출해야한다고 말하면서 키보드 컨트롤을 초기화합니다.


볼거리가 많지는 않지만 여기까지 게임을 볼 수 있습니다!


지도

타일 맵은 우리의 플레이 영역을 나타냅니다. 

// the structure of the map

var map;


가장 단순한 형태의 절차를 사용하여 맵을 생성합니다. 벽을 포함 할 셀과 바닥을 임의로 결정합니다.

function initMap() {

        // create a new random map

        map = [];

        for (var y = 0; y < ROWS; y++) {

                var newRow = [];

                for (var x = 0; x < COLS; x++) {

                     if (Math.random() > 0.8)

                        newRow.push('#');

                    else

                        newRow.push('.');

                }

                map.push(newRow);

        }

}


관련 게시물


이것은 우리에게 80%가 벽이고 나머지가 바닥 인것을 제공합니다.


키보드 이벤트 리스너를 설정 한 직후 create () 함수로 게임의 새 맵을 초기화합니다.

function create() {

        // init keyboard commands

        game.input.keyboard.addCallbacks(null, null, onKeyUp);


        // initialize map

        initMap();

}


여기서 데모를 볼 수 있습니다. 아직 지도를 렌더링하지 않았으므로 아무 것도 볼 수 없습니다.


화면

지도를 그릴 시간입니다! 우리의 화면은 각각 하나의 문자를 포함하는 텍스트 요소의 2D 배열입니다.

// the ascii display, as a 2d array of characters

var asciidisplay;


두 가지 모두 간단한 ASCII 문자이기 때문에 지도를 그리면 화면의 내용이 지도의 값으로 채워집니다.

function drawMap() {

    for (var y = 0; y < ROWS; y++)

        for (var x = 0; x < COLS; x++)

            asciidisplay[y][x].content = map[y][x];

}


마지막으로 맵을 그리기 전에 화면을 초기화해야합니다. 우리는 create () 함수로 돌아 갑니다.

function create() {

        // init keyboard commands

        game.input.keyboard.addCallbacks(null, null, onKeyUp);


        // initialize map

        initMap();


        // initialize screen

        asciidisplay = [];

        for (var y = 0; y < ROWS; y++) {

                var newRow = [];

                asciidisplay.push(newRow);

                for (var x = 0; x < COLS; x++)

                        newRow.push( initCell('', x, y) );

        }

        drawMap();

}


function initCell(chr, x, y) {

        // add a single cell in a given position to the ascii display

        var style = { font: FONT + "px monospace", fill:"#fff"};

        return game.add.text(FONT*0.6*x, FONT*y, chr, style);

}


이제 프로젝트를 실행할 때 무작위지도가 표시됩니다.


액터

다음 줄에는 플레이어 캐릭터와 패배해야 할 적들이 있습니다. 각 액터는 맵의 위치에 대해 x와 y, 히트 포인트에 대해 hp의 세 필드가있는 객체입니다.


우리는 모든 액터를 actorList 배열에 유지합니다 (첫 번째 요소는 플레이어입니다). 우리는 또한 빠른 검색을위한 키로 액터의 위치와 연관 배열을 유지하므로 어떤 액터가 특정 위치를 차지하고 있는지 찾기 위해 전체 액터리스트를 반복 할 필요가 없습니다. 이것은 우리가 이동과 전투를 코드화 할 때 우리를 도울 것입니다.

// a list of all actors; 0 is the player

var player;

var actorList;

var livingEnemies;


// points to each actor in its position, for quick searching

var actorMap;


우리는 모든 액터를 만들고 지도에 무작위로 자유로운 위치에 할당합니다.

function randomInt(max) {

   return Math.floor(Math.random() * max);

}


function initActors() {

        // create actors at random locations

        actorList = [];

        actorMap = {};

        for (var e=0; e<ACTORS; e++) {

                // create new actor

                var actor = { x:0, y:0, hp:e == 0?3:1 };

                do {

                        // pick a random position that is both a floor and not occupied

                        actor.y=randomInt(ROWS);

                        actor.x=randomInt(COLS);

                } while ( map[actor.y][actor.x] == '#' ||

actorMap[actor.y + "_" + actor.x] != null );


                // add references to the actor to the actors list & map

                actorMap[actor.y + "_" + actor.x]= actor;

                actorList.push(actor);

        }


        // the player is the first actor in the list

        player = actorList[0];

        livingEnemies = ACTORS-1;

}


액터를 보여줄 시간입니다! 우리는 모든 적을 e로, 플레이어 캐릭터를 HP의 숫자로 그립니다.

function drawActors() {

        for (var a in actorList) {

                if (actorList[a].hp > 0)

                        asciidisplay[actorList[a].y][actorList[a].x].content = a == 0?''

+ player.hp:'e';

        }

}


방금 작성한 함수를 사용하여 create () 함수에서 모든 액터를 초기화하고 그립니다.

function create() {

    ...

    // initialize actors

    initActors();

    ...

    drawActors();

}.


우리는 이제 플레이어 캐릭터와 적들이 화면에 표시되어 있는것을 볼수 있습니다.


차단 및 이동식 타일

우리는 액터가 스크린과 벽을 벗어나지 않도록해야합니다. 그래서 간단한 체크를 추가하여 주어진 액터가 어느 방향으로 걸어 갈 수 있는지 살펴 봅시다.

function canGo(actor,dir) {

    return  actor.x+dir.x >= 0 &&

        actor.x+dir.x <= COLS - 1 &&

                actor.y+dir.y >= 0 &&

        actor.y+dir.y <= ROWS - 1 &&

        map[actor.y+dir.y][actor.x +dir.x] == '.';

}


이동과 전투

우리는 마침내 약간의 상호 작용에 도달했습니다 : 

이동과 전투! 클래식 roguelikes에서 기본적인 공격은 다른 액터로 이동함으로써 트리거 되기 때문에 우리는 액터와 방향을 취하는 moveTo () 함수 (두 방향을 x와 y를 액터가 들어가는 위치로 옮깁니다).를 추가 하겠습니다.

function moveTo(actor, dir) {

        // check if actor can move in the given direction

        if (!canGo(actor,dir))

                return false;


        // moves actor to the new location

        var newKey = (actor.y + dir.y) +'_' + (actor.x + dir.x);

        // if the destination tile has an actor in it

        if (actorMap[newKey] != null) {

                //decrement hitpoints of the actor at the destination tile

                var victim = actorMap[newKey];

                victim.hp--;


                // if it's dead remove its reference

                if (victim.hp == 0) {

                        actorMap[newKey]= null;

                        actorList[actorList.indexOf(victim)]=null;

                        if(victim!=player) {

                                livingEnemies--;

                                if (livingEnemies == 0) {

                                        // victory message

                                        var victory = game.add.text(

game.world.centerX,

game.world.centerY,

'Victory!\nCtrl+r to restart',

{ fill : '#2e2', align: "center" } );

                                        victory.anchor.setTo(0.5,0.5);

                                }

                        }

                }

        } else {

                // remove reference to the actor's old position

                actorMap[actor.y + '_' + actor.x]= null;


                // update position

                actor.y+=dir.y;

                actor.x+=dir.x;


                // add reference to the actor's new position

                actorMap[actor.y + '_' + actor.x]=actor;

        }

        return true;

}


기본적으로

- 액터가 올바른 위치로 이동하려고하는지 확인합니다.

- 그 위치에 다른 액터가 있다면, 우리는 그것을 공격합니다 (HP 숫자가 0이되면 죽이기도합니다).

- 새로운 위치에 다른 액터가 없다면, 우리는 거기로 이동합니다.


우리는 또한 마지막 적을 살해 한 후 간단한 승리 메시지를 보여 주고, 우리가 유효한 이동을 수행했는지 여부에 따라 false 또는 true를 반환합니다.


이제는 onKeyUp () 함수로 돌아가서 사용자가 키를 누를 때마다 화면에서 이전 액터의 위치를 지우고 (지도를 위에 그려서) 플레이어 캐릭터를 이동하고, 위치를 찾은 다음 액터를 다시 그립니다.

function onKeyUp(event) {

        // draw map to overwrite previous actors positions

        drawMap();


        // act on player input

        var acted = false;

        switch (event.keyCode) {

                case Phaser.Keyboard.LEFT:

                        acted = moveTo(player, {x:-1, y:0});

                        break; 

                case Phaser.Keyboard.RIGHT:

                        acted = moveTo(player,{x:1, y:0});

                        break; 

                case Phaser.Keyboard.UP:

                        acted = moveTo(player, {x:0, y:-1});

                        break; 

                case Phaser.Keyboard.DOWN:

                        acted = moveTo(player, {x:0, y:1});

                        break;

        } 

        // draw actors in new positions

        drawActors();

}


우리는 곧 행동 변수를 사용하여 각 플레이어가 입력 한 후에 적들이 행동해야 하는지를 알 수 있습니다.


기본 인공 지능


이제 플레이어 캐릭터가 움직이고 공격하기 때문에 플레이어가 적과 거리가 6 단계 이하인 경우 매우 간단한 경로 찾기에 따라 적이 플레이를 공격하도록 하겠습니다.. (플레이어가 멀어지면 적들은 무작위로 걷습니다.)


우리의 공격 코드는 액터가 누구를 공격하는지 상관하지 않습니다. 즉, 만약 당신이 그들을 바로 정렬한다면, 적들은 플레이어 캐릭터를서로 공격 할 것입니다!

function aiAct(actor) {

        var directions = [ { x: -1, y:0 }, { x:1, y:0 }, { x:0, y: -1 }, { x:0, y:1 } ];

        var dx = player.x - actor.x;

        var dy = player.y - actor.y;


        // if player is far away, walk randomly

        if (Math.abs(dx) + Math.abs(dy) > 6)

                // try to walk in random directions until you succeed once

                while (!moveTo(actor, directions[randomInt(directions.length)])) { };


        // otherwise walk towards player

        if (Math.abs(dx) > Math.abs(dy)) {

                if (dx < 0) {

                        // left

                        moveTo(actor, directions[0]);

                } else {

                        // right

                        moveTo(actor, directions[1]);

                }

        } else {

                if (dy < 0) {

                        // up

                        moveTo(actor, directions[2]);

                } else {

                        // down

                        moveTo(actor, directions[3]);

                }

        }

        if (player.hp < 1) {

                // game over message

                var gameOver = game.add.text(game.world.centerX,

game.world.centerY,

'Game Over\nCtrl+r to restart',

{ fill : '#e22', align: "center" } );

                gameOver.anchor.setTo(0.5,0.5);

        }

}


또한 우리는 적의 한 명이 플레이어를 죽이면 게임오버 메세지를 출력하도록 하였습니다.


이제는 플레이어가 움직일 때마다 적이 움직니는 것처럼  만드는 것입니다. 이 작업은 새로운 위치에 액터를 그리기 전에 onKeyUp () 함수의 끝 부분에 다음 코드를 추가해야합니다.

function onKeyUp(event) {

        ...

        // enemies act every time the player does

        if (acted)

                for (var enemy in actorList) {

                        // skip the player

                        if(enemy==0)

                                continue;

                        var e = actorList[enemy];

                        if (e != null)

                                aiAct(e);

                } 

        // draw actors in new positions

        drawActors();

}


Posted by 마스터킹
|


점프 정리하기

이제 우리의 영웅이 뛰고 있습니다. 그러나 문제가 있습니다. 때로는 점프가 발생하지 않으며 게임에 대한 흥미가 없습니다.


몇 가지 테스트를 한 결과 리스너가 때로 잘못된 순서로 호출되었다는 것을 알게되었습니다. 빨리 클릭하면 다운 이벤트가 발생하기 전에 위 이벤트가 실행되고 즉시 파워메터의 전원이 제거됩니다. 나는 이것을 세 가지로 고정시켰습니다.


- 다운 이벤트가 트리거 될 때까지 업 이벤트를 등록하기 위해 대기 중

- 각각의 이벤트 리스너가 트리거 된 이후에 다운 및 업 이벤트 리스너 제거

- 필요에 따라 이벤트 재 등록

아래의 강조 표시된 행을 참조하십시오.

var StateMain = {

    preload: function() {

        game.load.image("ground", "images/ground.png");

        game.load.image("hero", "images/hero.png");

        game.load.image("bar", "images/powerbar.png");

        game.load.image("block", "images/block.png");

    },

    create: function() {

        this.power = 0;

        //turn the background sky blue

        game.stage.backgroundColor = "#00ffff";

        //add the ground

        this.ground = game.add.sprite(0, game.height * .9, "ground");

        //add the hero in

        this.hero = game.add.sprite(game.width * .2, this.ground.y - 25, "hero");

        //add the power bar just above the head of the hero

        this.powerBar = game.add.sprite(this.hero.x + 25, this.hero.y - 25, "bar");

        this.powerBar.width = 0;

        //start the physics engine

        game.physics.startSystem(Phaser.Physics.ARCADE);

        //enable the hero for physics

        game.physics.enable(this.hero, Phaser.Physics.ARCADE);

        game.physics.enable(this.ground, Phaser.Physics.ARCADE);

        //game.physics.arcade.gravity.y = 100;

        this.hero.body.gravity.y = 200;

        this.hero.body.collideWorldBounds = true;

        this.hero.body.bounce.set(0, .2);

        this.ground.body.immovable = true;

        //set listeners

        game.input.onDown.add(this.mouseDown, this);

    },

    mouseDown: function() {

        game.input.onDown.remove(this.mouseDown, this);

        this.timer = game.time.events.loop(Phaser.Timer.SECOND / 1000, this.increasePower, this);

        game.input.onUp.add(this.mouseUp, this);

    },

    mouseUp: function() {

        game.input.onUp.remove(this.mouseUp, this);

        this.doJump();

        game.time.events.remove(this.timer);

        this.power = 0;

        this.powerBar.width = 0;

        game.input.onDown.add(this.mouseDown, this);

    },

    increasePower: function() {

        this.power++;

        this.powerBar.width = this.power;

        if (this.power &gt; 50) {

            this.power = 50;

        }

    },

    doJump: function() {

        this.hero.body.velocity.y = -this.power * 12;

    },

    update: function() {

        game.physics.arcade.collide(this.hero, this.ground);

    }

}


이제 완벽한 점프를 하게 되었지만 다른 문제를 발견했을 것입니다. 당신은 영웅이 날 수 있도록 마우스를 계속 누를 수 있습니다. 중력과 속력을 결합하면 날아 다니는 새 게임을 만드는 데 도움이 될 것입니다. 주인공이 점프 할 때 영웅이되기를 원하기 때문에 주인공의 위치를 기록해 두십시오.


mouseDown에 대한 이벤트 리스너를 추가하기 바로 전에 create 함수에서이 행을 추가하십시오.

//record the initial position

this.startY = this.hero.y;


이제 mouseDown 함수의 위치를 확인하면됩니다. 주인공이 시작 위치에 있지 않으면, 우리는 단순히 기능을 종료하고 점프하지 않습니다.

mouseDown 함수의 시작 부분에 다음을 추가합니다.

if (this.hero.y != this.startY) {

            return;

}


이제 영웅이 뛰어 넘을 무언가를 만들 때입니다. 우리는 블록 벽을 만들고 싶습니다. 그 벽을 구성하는 모든 블록을 보유 할 그룹을 만들어 봅시다.


create 함수의 끝에서 add 합니다.

this.blocks = game.add.group();


그런 다음 해당 그룹에 임의의 수의 블록을 추가하는 함수를 만들어 보겠습니다.

makeBlocks: function() {

        var wallHeight=game.rnd.integerInRange(2, 6);

        for (var i = 0; i &lt; wallHeight; i++) {

            var block = game.add.sprite(0, -i * 25, "block");

            this.blocks.add(block);

        }

    }


결과는 다음과 같습니다.


이제 우리는 벽을 가지고 있습니다. 다음 장에서는 게임에 움직임을 추가 할 것입니다.

Posted by 마스터킹
|


물리엔진 추가하기


우리는 Phaser Js 로 Runner 게임 만들기 Part - 1 에서 주인공의 파워메터 컨트롤 부분만 제작하였습니다. 직접 주인공을 제어하고 움직이는 부분은 제작하지 않았습니다.  

그래서 주인공을 제어하고 움직이게 하기 위해서, 가장 먼저 할 일은 물리 엔진을 시작하는 것입니다. Phaser 에는 여러 개의 엔진이 있습니다. 우리는 아케이드 엔진을 사용할 것입니다.


create 함수의 끝에서 (그러나 mouseListeners 바로 위에)이 코드 라인을 배치하여 물리 엔진을 시작하십시오

//start the physics engine

game.physics.startSystem(Phaser.Physics.ARCADE);


이것은 우리가 스프라이트에 물리엔진을 추가하고 싶다는 것을 Phaser 가 알 수있게 해줍니다. 그러나 모든 단일 스프라이트에 물리를 자동으로 추가하지는 않습니다. 각 스프라이트를 활성화해야합니다. 이 코드를 다음 행에 배치하십시오.

//enable the hero for physics

game.physics.enable(this.hero, Phaser.Physics.ARCADE);


이제 우리의 스프라이트는 물리 속성을 설정할 준비가되었습니다. 영웅의 속도를 설정하는 점프 기능을 만들어 봅시다.

doJump: function() {

        this.hero.body.velocity.y = -this.power * 12;

    }


우리는 단지 y 속도를 원합니다. 그리고 그것을 위로 향하게 하기 위해서 그것을 음수로 설정하고 싶습니다. 나는 그것을 힘 (또는 PowerBar의 폭) 12 번으로 설정했습니다. 이것은 적당한 속도를 위쪽으로 내는 것처럼 보일것입니다.


다음은 stateMain.js 코드 입니다.

var StateMain = {

    preload: function() {

        game.load.image("ground", "images/ground.png");

        game.load.image("hero", "images/hero.png");

        game.load.image("bar", "images/powerbar.png");

        game.load.image("block", "images/block.png");

    },

    create: function() {

        this.power = 0;

        //turn the background sky blue

        game.stage.backgroundColor = "#00ffff";

        //add the ground

        var ground = game.add.sprite(0, game.height * .9, "ground");

        //add the hero in

        this.hero = game.add.sprite(game.width * .2, ground.y - 25, "hero");

        //add the power bar just above the head of the hero

        this.powerBar = game.add.sprite(this.hero.x + 25, this.hero.y - 25, "bar");

        this.powerBar.width = 0;

        //start the physics engine

        game.physics.startSystem(Phaser.Physics.ARCADE);

        //enable the hero for physics

        game.physics.enable(this.hero, Phaser.Physics.ARCADE);

        //set listeners

        game.input.onUp.add(this.mouseUp, this);

        game.input.onDown.add(this.mouseDown, this);

    },

    mouseDown: function() {

        this.timer = game.time.events.loop(Phaser.Timer.SECOND / 1000, this.increasePower, this);

    },

    mouseUp: function() {

        this.doJump();

        game.time.events.remove(this.timer);

        this.power = 0;

        this.powerBar.width = 0;

    },

    increasePower: function() {

        this.power++;

        this.powerBar.width = this.power;

        if (this.power &gt; 50) {

            this.power = 50;

        }

    },

    doJump: function() {

        this.hero.body.velocity.y = -this.power * 12;

    },

    update: function() {}

}


마우스를 놓을 때 볼 수 있듯이 영웅은 올라가서 거기 머물러 있습니다.


올라가는 것은 내려와야합니다.

영웅이 지구로 내려 오도록 우리는 그의 몸에 중력을 더해야합니다. 우리는 지구상의 중력을 설정할 수 있지만, 그것은 땅에도 영향을 미치고, 땅이 화면에서 떨어지게 만듭니다. 지면의 중력을 0으로 설정하여 무시할 수 있고, 영웅의 중력을 설정하는 것이 쉽습니다.

this.hero.body.gravity.y = 200;


지금 게임을 실행하면 주인공이 게임의 맨 아래를 빠져 나가는 것을 볼 수 있습니다. 위의 예에서도 영웅이 게임의 맨 위로 날아갈 수 있습니다.

다음 한 줄의 코드로 두 가지를 모두 멈출 수 있습니다.

this.hero.body.collideWorldBounds = true;


이제 영웅은 게임에 머물러 있지만 여전히 땅을 빠져 나옵니다. 그것을 수정합시다.

첫째, 우리는 지상 스프라이트가 나머지 주들에게 접근 가능하도록해야합니다.

코드를 수정합시다.

var ground = game.add.sprite(0, game.height * .9, "ground");

this.ground = game.add.sprite(0, game.height * .9, "ground");

으로 수정합니다.


그러면 로컬 스프라이트가 주 전체 스프라이트로 변경됩니다.

중요 : 또한 ground 변수를 this.ground로 변경해야합니다.


지면의 물리엔진을 활성화 합니다.

game.physics.enable(this.ground, Phaser.Physics.ARCADE);


다음으로 update 함수에서 collision 관계를 설정하십시오. 두 물체가 충돌 할 때 물리엔진이 서로 작용하게됩니다.

update: function() {

         game.physics.arcade.collide(this.hero, this.ground);

    }


지금 게임을 실행하면 주인공이 화면에서 벗어나게됩니다.


Phaser 에게 그 지면은 움직이지 않는다고 설정합니다.

this.ground.body.immovable = true;


정리된 stateMain.js 코드 입니다.

var StateMain = {

    preload: function() {

        game.load.image("ground", "images/ground.png");

        game.load.image("hero", "images/hero.png");

        game.load.image("bar", "images/powerbar.png");

        game.load.image("block", "images/block.png");

    },

    create: function() {

        this.power = 0;

        //turn the background sky blue

        game.stage.backgroundColor = "#00ffff";

        //add the ground

        this.ground = game.add.sprite(0, game.height * .9, "ground");

        //add the hero in

        this.hero = game.add.sprite(game.width * .2, this.ground.y - 25, "hero");

        //add the power bar just above the head of the hero

        this.powerBar = game.add.sprite(this.hero.x + 25, this.hero.y - 25, "bar");

        this.powerBar.width = 0;

        //start the physics engine

        game.physics.startSystem(Phaser.Physics.ARCADE);

        //enable the hero for physics

        game.physics.enable(this.hero, Phaser.Physics.ARCADE);

        game.physics.enable(this.ground, Phaser.Physics.ARCADE);


        this.hero.body.gravity.y = 200;

        this.hero.body.collideWorldBounds = true;

        this.ground.body.immovable = true;

        //set listeners

        game.input.onUp.add(this.mouseUp, this);

        game.input.onDown.add(this.mouseDown, this);

    },

    mouseDown: function() {

        this.timer = game.time.events.loop(Phaser.Timer.SECOND / 1000, this.increasePower, this);

    },

    mouseUp: function() {

        this.doJump();

        game.time.events.remove(this.timer);

        this.power = 0;

        this.powerBar.width = 0;

    },

    increasePower: function() {

        this.power++;

        this.powerBar.width = this.power;

        if (this.power &gt; 50) {

            this.power = 50;

        }

    },

    doJump: function() {

        this.hero.body.velocity.y = -this.power * 12;

    },

    update: function() {

         game.physics.arcade.collide(this.hero, this.ground);

    }

}


결과입니다.


Posted by 마스터킹
|


Runner게임은 모바일 게임에서 필수 요소가되었습니다. 게임 개발자는 조만간 비슷한 것을 만들어 달라고 요청할 것입니다. 게임 개발에서 수년간 일하면서 그래픽을 만들기 전에 종종 게임을 잘 코딩해야합니다. 예술가들이 멋진 예술을 끝내기를 기다리는 동안, 나는  추상적인 그래픽을 사용할것입니다. 내가 같이 일했던 한 디자이너는 이것을 "dev art"라고 불렀습니다.


다음은 내가 사용할 기본적인 기술입니다.

- 우리의 영웅, 주인공.

- 서있을 그라운드.

- 뛰어 넘을 블록.

- 점프 할 높이를 나타내는 파워메터.

첫 번째 부분에서는 기초를 설정하고 파워 미터가 작동하도록 하겠습니다.


기본 템플릿

나는 내 자신의 기본 템플릿을 사용하고 있습니다.이 기본 템플릿은 약간의 시간을 절약하기 위해 만든 기본 템플릿입니다.

여기에서 다운로드 할 수 있습니다.


이미지 추가하기

먼저 프리로드 기능에서 키와 경로를 제공하여 이미지를 미리 로드합니다.

game.load.image("ground","images/ground.png");

game.load.image("hero","images/hero.png");

game.load.image("bar","images/powerbar.png");

game.load.image("block","images/block.png");


하늘 만들기

영웅은 검은 색 사각형이므로 무대 색상을 하늘색으로 변경합시다.

이것을 create 함수에 두십시오.

//turn the background sky blue

game.stage.backgroundColor="#00ffff";


메인 파트 추가

이제 땅을 만들겠습니다. 모바일 크기가 다양하기 때문에 화면의 높이의 90 % 또는 바닥에서 10 %로 바닥을 둡니다. 나중에 조정할 수 있습니다. 주인공의 키는 25px이므로 지상과 같은 y 위치에 놓고 땅바닥에 서게 하려면 25를 빼면됩니다.

//add the ground

var ground=game.add.sprite(0,game.height*.9,"ground");

//add the hero

this.hero=game.add.sprite(game.width*.2,ground.y-25,"hero");


게임은 이제 다음과 같이 보일 것입니다.


파워 미터

파워미터는 전원이 바뀔 때마다 추가 할 수 있고 너비를 변경할 수있는 작은 비트 맵입니다. 플레이어는 마우스 또는 손가락을 누른 상태에서 mouseUp 이벤트가 호출되면 점프하여 전원을 변경합니다. 마우스가 길수록 높을수록 점프가 됩니다.


먼저 변수를 변경해야합니다.


다음 코드를 create 함수의 맨 위에 놓습니다.

this.power=0;


다음으로, 우리는 영웅의 머리 위 오른쪽에 25 픽셀, 영웅의 좌표보다 25 픽셀 위의 파워 바를 놓습니다.

//add the power bar just above the head of the hero

this.powerBar=game.add.sprite(this.hero.x+25,this.hero.y-25,"bar");

this.powerBar.width=0;


리스너에 mouseUp 및 mouseDown을 추가합니다.

//set listeners

game.input.onUp.add(this.mouseUp, this);

game.input.onDown.add(this.mouseDown, this);


mouseDown이 호출되면 타이머가 시작되어 전원이 계속 증가합니다. mouseUp이 호출 될 때 우리는 그 타이머를 멈춤니다.  우리는 Phaser.Timer.Second / 1000에 타이머를 설정할 것입니다. 이것은 타이머가 1 초에 1000 번 실행된다는 것을 의미합니다. 이렇게하면 부드러운 파워 바 효과를 얻을 수 있습니다.

mouseDown:function()

{

  this.timer=game.time.events.loop(Phaser.Timer.SECOND/1000, this.increasePower, this);

},

mouseUp:function()

{

   game.time.events.remove(this.timer);

   this.power=0;

   this.powerBar.width=0;

},


이 항목에서 마지막으로 다루는 것은 파워 변수를 증가시키고 파워 바의 너비를 변경하는 increasePower 함수를 설정하는 것입니다. 우리는 현재 50의 힘을 제한 할 것입니다.하지만 게임이 개발되면 나중에 변경할 수 있습니다.

increasePower:function()

    {

     this.power++;

     this.powerBar.width=this.power;

     if (this.power&gt;50)

     {

       this.power=50;

     }

    },


이 단원의 마지막 코드는 다음과 같습니다.

var StateMain = {

    preload: function() {

        game.load.image("ground", "images/ground.png");

        game.load.image("hero", "images/hero.png");

        game.load.image("bar", "images/powerbar.png");

        game.load.image("block", "images/block.png");

    },

    create: function() {

        this.power = 0;

        //turn the background sky blue

        game.stage.backgroundColor = "#00ffff";

        //add the ground

        var ground = game.add.sprite(0, game.height * .9, "ground");

        //add the hero in

        this.hero = game.add.sprite(game.width * .2, ground.y - 25, "hero");

        //add the power bar just above the head of the hero

        this.powerBar = game.add.sprite(this.hero.x + 25, this.hero.y - 25, "bar");

        this.powerBar.width = 0;

        //set listeners

        game.input.onUp.add(this.mouseUp, this);

        game.input.onDown.add(this.mouseDown, this);

    },

    mouseDown: function() {

        this.timer = game.time.events.loop(Phaser.Timer.SECOND / 1000, this.increasePower, this);

    },

    mouseUp: function() {

        game.time.events.remove(this.timer);

        this.power = 0;

        this.powerBar.width = 0;

    },

    increasePower: function() {

        this.power++;

        this.powerBar.width = this.power;

        if (this.power &gt; 50) {

            this.power = 50;

        }

    },

    update: function() {}

}


결과는 다음과 같습니다.


Posted by 마스터킹
|

가끔은 1 시간 만에 게임을 쓰기 위해 도전하고 싶습니다.

게임 내용은 먼저 컴퓨터가 4개의 다른 색상의 판넬에서 터치를 하게됩니다. 그리고 플레이어는 컴퓨터가 진행한 터치를 그대로 따로 하면 됩니다.


소스 코드는 다음과 같습니다.

var StateMain = {

    preload: function() {

        game.load.spritesheet("squares","images/squares.png",250,250);

        game.load.audio("note1","audio/1.mp3");

        game.load.audio("note2","audio/2.mp3");

        game.load.audio("note3","audio/3.mp3");

        game.load.audio("note4","audio/4.mp3");

        game.load.audio("bang","audio/bang.mp3");

    },

    create: function() {

        //define an array to hold the random song

        this.songArray = [];

        //define the notes and sound effects

        var note1 = game.add.audio("note1");

        var note2 = game.add.audio("note2");

        var note3 = game.add.audio("note3");

        var note4 = game.add.audio("note4");

        this.bang = game.add.audio("bang");

        //play the notes on an array for easy indexing

        this.noteArray = [note1, note2, note3, note4];

        //lock the click for while the song is playing

        this.clickLock = true;

        //make the blocks

        var red = this.getBlock(0);

        var blue = this.getBlock(1);

        var yellow = this.getBlock(2);

        var green = this.getBlock(3);

        //

        //put the blocks in a group

        //this will make it easy to center all the blocks

        //

        this.blocks = game.add.group();

        this.blocks.add(red);

        this.blocks.add(blue);

        this.blocks.add(yellow);

        this.blocks.add(green);

        //

        //position the blocks

        //all the postions were set at 0

        //so we just need to set some of the positions

        //

        blue.x = 250;

        yellow.y = 250;

        green.y = 250;

        green.x = 250;

        //make the blocks 80% of the width of the screen

        this.blocks.width = game.width * .8;

        //scale the height to match the width

        this.blocks.scale.y = this.blocks.scale.x;

        //center the blocks on the screen

        this.blocks.x = game.width / 2 - this.blocks.width / 2;

        this.blocks.y = game.height / 2 - this.blocks.height / 2;

        //alpha the blocks

        this.resetBlocks();

        //add a note to the song

        this.addToSong();

        //play the song

        this.playSong();

    },

    /**

     * [getBlock make a sprite, and add the click listener]

     * @param  {[type]} frame [this is the color of the block]

     * @return {[group]}  

     */

    getBlock: function(frame) {

        var block = game.add.sprite(0, 0, "squares");

        block.frame = frame;

        block.inputEnabled = true;

        block.events.onInputDown.add(this.clickBlock, this);

        return block;

    },

    /**

     * [resetBlocks turn all the blocks to 20% alpha]

     * @return {[none]}

     */

    resetBlocks: function() {

        this.blocks.forEach(function(block) {

            block.alpha = .2;

        });

    },

    /**

     * [addToSong push a random note on the songArray]

     */

    addToSong: function() {

        var s = game.rnd.integerInRange(0, 3);

        this.songArray.push(s);

    },

    playSong: function() {

        //set the playIndex to negative one

        this.playIndex = -1;

        //start the timer to play the notes

        this.songTimer = game.time.events.loop(Phaser.Timer.SECOND, this.nextNote, this);

    },

    nextNote: function() {

        //alpha the blocks

        this.resetBlocks();

        //advance the playIndex

        //we start at -1 so the first time the playIndex will be 0

        this.playIndex++;

        //if the play index is equal to the songArray length then

        //song is over

        //

        if (this.playIndex == this.songArray.length) {

            this.clickLock = false;

            this.clickIndex = 0;

            game.time.events.remove(this.songTimer);

            return;

        }

        //get the number of the note from the song

        var note = this.songArray[this.playIndex];

        //play the note

        this.playNote(note);

    },

    playNote: function(note) {

        //get the sound object from the note array

        var sound = this.noteArray[note];

        sound.play();

        //get the block that goes with the sound

        var block = this.blocks.getChildAt(note);

        //light it up!

        block.alpha = 1;

        //turn off the lights after a 1/4 of a second delay

        game.time.events.add(Phaser.Timer.SECOND / 4, this.resetBlocks, this);

    },

    clickBlock: function(target) {

        //if the song is playing return

        if (this.clickLock == true) {

            return;

        }

        //get the frame from the square clicked

        var index = target.frame;

        //if the index is equal to the number

        //in the songArray then the user

        //has pressed the right notes

        if (index == this.songArray[this.clickIndex]) {

            //get the note from the songArray

            var note = this.songArray[this.clickIndex];

            //play the note

            this.playNote(note);

            this.clickIndex++;

            //if the clickIndex is equal to the songArray length we have

            //reached the end of the song

            if (this.clickIndex == this.songArray.length) {

                this.clickLock = true;

                this.playIndex = -1;

                this.addToSong();

                this.playSong();

                return;

            }

        } else {

            //wrong note!

            //Game Over

            this.bang.play();

            this.clickLock = true;

            game.state.start("StateOver");

        }

    },

    update: function() {}

}


Posted by 마스터킹
|


Toast메시지는 페이드 인 및 페이드 아웃되는 문자 메시지입니다. 유리를 올린 사람과 축배를하고 유리를 다시 내리는 것과 비슷하기 때문에 토스트 메시지라는 이름이 붙어 있습니다.


여기에 예제가 있습니다.

var StateMain = {

    preload: function() {

        game.load.image("toastBack", "images/back.png");

        game.load.image("btnToast", "images/btnGenerate.png");

    },

    create: function() {


        //SET UP TEST BUTTON

     this.btnToast=game.add.sprite(game.world.centerX,game.height*.25,"btnToast");

     this.btnToast.anchor.set(0.5,0.5);

     this.btnToast.inputEnabled=true;

     this.btnToast.events.onInputDown.add(this.testToast,this);

    },

    testToast: function() {

        this.btnToast.visible=false;

        //get an instance of a toast object

        //and place it in postion

        var toast = this.makeToast("TEST!");

        toast.x = game.world.centerX;

        toast.y = game.world.height * .8;

        //fade in the toast object

        this.fadeIn(toast);

    },

    makeToast: function(message) {

        var toastGroup = game.add.group();

        var toastText = game.add.text(0, 0, message);

        var toastBack = game.add.sprite(0, 0, "toastBack");

        toastBack.width = game.width * .9;

        //

        //

        //SET ANCHORS

        toastText.anchor.set(0.5, 0.5);

        toastBack.anchor.set(0.5, 0.5);

        //

        //ADD THE TEXT AND SPRITE GRAPHIC TO THE TOAST GROUP

        toastGroup.add(toastBack);

        toastGroup.add(toastText);

        toastGroup.alpha = 0;

        //

        return toastGroup;

    },

    fadeIn: function(obj) {

        var tween = game.add.tween(obj).to({

            alpha: 1

        }, 1000, Phaser.Easing.Linear.None, true);

        tween.onComplete.add(this.delay, this);

    },

    delay:function(obj)

    {

        //WHEN TWEEN IS DONE PAUSE HERE FOR DELAY

        //SET A FADE OBJECT IN THE SCOPE OF THE STATE,

        //SINCE WE CAN NOT PASS THE OBJECT IN THE TIMER

     this.fadeObj=obj;

     game.time.events.add(Phaser.Timer.SECOND*2, this.delayDone, this);

    },

    delayDone:function()

    {

        //NOW THAT DELAY IS DONE CALL FADE OUT

     this.fadeOut(this.fadeObj);

    },

    fadeOut: function(obj) {

        var tween = game.add.tween(obj).to({

            alpha: 0

        }, 1000, Phaser.Easing.Linear.None, true);

        tween.onComplete.add(this.fadeDone, this);

    },

    fadeDone:function()

    {

        this.btnToast.visible=true;

    },

    update: function() {}

}


Posted by 마스터킹
|

최근에 나에게 매우 유용했던 것은 두 물체 사이의 각도를 구하거나 마우스와 중심 문자 사이의 각도를 얻을 수있게하는 것입니다. 예를 들어, 클릭하고 발사하려는 우주선이있는 게임에서 우주선을 돌릴 수있는 각도를 알아야합니다. 각도를 얻는 실제 수학은 약간 복잡하고 나는 그것을 이해하는 척하지는 않지만, 내가 가지고있는 매우 유용한 코드가 있습니다.

getAngle: function(obj1, obj2) {

// angle in radians

var angleRadians = Math.atan2(obj2.y - obj1.y, obj2.x - obj1.x);

// angle in degrees

var angleDeg = (Math.atan2(obj2.y - obj1.y, obj2.x - obj1.x) * 180 / Math.PI);

return angleDeg;

},


각도를 얻으려면이 두 객체를 전달해야합니다.

var angle = this.getAngle (goodGuy, monster);


다음은 우주선을 돌리기 위해 마우스와 우주선 사이의 각도를 사용하는 예입니다.

우주선이 마우스를 가리 키도록하려면 아무 곳이나 클릭하십시오.


그리고 예제 코드는 다음과 같습니다.

var StateMain = {

    preload: function() {

        game.load.image("ship", "images/ship.png");

    },

    create: function() {

        this.ship = game.add.sprite(game.world.centerX, game.world.centerY, "ship");

        this.ship.anchor.set(0.5, 0.5);

        game.input.onUp.add(this.clickCanvas, this);

    },

    clickCanvas: function() {

        //make an object from the mouse postion

        var obj1 = {

            x: game.input.x,

            y: game.input.y

        };

        //get the angle between the mouse and the ship and assign that to the

        //ship's angle

        this.ship.angle = this.getAngle(obj1, this.ship);

    },

    getAngle: function(obj1, obj2) {

        //I use the offset because the ship is pointing down

        //at the 6 o'clock position

        //set to 0 if your sprite is facing 3 o'clock

        //set to 180 if your sprite is facing 9 o'clock

        //set to 270 if your sprite is facing 12 o'clock

        //

        offSet = 90;

        // angle in radians

        var angleRadians = Math.atan2(obj2.y - obj1.y, obj2.x - obj1.x);

        // angle in degrees

        var angleDeg = (Math.atan2(obj2.y - obj1.y, obj2.x - obj1.x) * 180 / Math.PI);

        //add the offset

        angleDeg += offSet;

        return angleDeg;

    },

    update: function() {}

}


Posted by 마스터킹
|

이 비디오에서는 23 줄의 코드만으로 Phaser에서 미사일을 만들고 촬영하는 방법을 살펴 봅니다.


기본적인 생각은 그룹 내부에 스프라이트 미사일을 만드는 것입니다. 스프라이트를 마우스의 x 위치에 놓고 y 위치를 게임 높이 아래에 놓습니다. 그런 다음 업데이트 기능을 수행하는 동안 그룹을 반복하고 각 미사일의 y 위치에서 빼냅니다.


Posted by 마스터킹
|