HTML5GAME :: 'PROGRAMMING/Phaser Js' 카테고리의 글 목록 (5 Page)

달력

52024  이전 다음

  • 1
  • 2
  • 3
  • 4
  • 5
  • 6
  • 7
  • 8
  • 9
  • 10
  • 11
  • 12
  • 13
  • 14
  • 15
  • 16
  • 17
  • 18
  • 19
  • 20
  • 21
  • 22
  • 23
  • 24
  • 25
  • 26
  • 27
  • 28
  • 29
  • 30
  • 31

저는 종종 프로젝트 중 그룹으로 생성된 객체를 드래그할 필요가 있다는 문제에 직면했습니다.

지난 며칠간 프로젝트로 인해 이것은 나를 괴롭혔습니다.

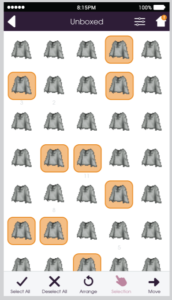
나는 현재 그리드에 엄지 손톱을 많이 표시해야하는 앱을 만들고 있습니다.

그리드는 수직으로 스크롤해야하며 축소판을 클릭해야합니다.


이제 Phaser의 그룹에서 드래그를 구현하려고 시도해 본 적이 있다면 쉬운 일이 아닌지 알 수 있습니다.

Phaser의 창시자 인 Richard Davey는 html5gamedevs 포럼에서이 게시물의 그룹을 끌 수있는 기본 방법이없는 이유를 설명합니다.


"그것은 실제로 생각보다 조금 더 복잡합니다. 그룹에는 모든 영역이 없으며 모든 방향에서 무한합니다. 따라서 클릭 한 경우 감지 할 수 없습니다. 그러나 드래그하여 다른 모든 자식, 그 자식 또는 그룹 x / y 배치 자체를 업데이트해야한다면 쉽게 자식을 클릭 할 수 있습니까? (차례 차례로 다른 아이들을, 당신이 예기 할 방법에서 어쩌면 단지) 새롭게 할 것입니다. 그리고 중첩 된 그룹은 어떻습니까?"


필자는이 기능이 마음에 든다. 표면에 나타나는 것처럼 구현하기가 쉽지 않다.


Brainstorming the solution

그래서 내가 뭘해야하니? 내가 생각해 낸 첫 번째 해결책은 그룹의 높이와 너비가 같고 드래그 할 수 있도록 스프라이트를 만드는 것입니다. 작동하지만 새로운 자체 문제는 스프라이트를 클릭하여 개별 축소판에 도달 할 수 없다는 것입니다. 이것은 프로젝트의 핵심 부분입니다. 이제는 더 나은 솔루션이 필요하다는 것을 알게되었습니다. 이것은 내가 지금까지 알고있는 것이다 :


내 요구 사항 :

- 그룹 드래그

- 자녀를 클릭 할 수있는 상태로두기


내가 지금까지 알고있는 것 :

- 클릭 할 수있는 스프라이트는 마우스 이벤트를 다른 스프라이트로 차단합니다.

- 그룹이 마우스 이벤트를 감지 할 수 없습니다.

- Phaser의 드래그를 사용하여 그룹을 끌 수 없습니다.

- game.input은 아무것도 차단되지 않습니다.


그 마지막 요점은 내가 끌기가 무엇인지 생각하고있다 :

- 마우스 다운 이벤트

- 마우스가 눈금의 범위 내에 있는지 확인하기

- 마우스의 움직임을 확인하고 필요에 따라 눈금을 업데이트하십시오.


여기서 마우스라는 용어를 사용하고 있지만 터치 이벤트 일 수도 있습니다.


여기에 내가 지금 애플 리케이션에서 사용하고있는 해결책이있다. 이 예제에서는 Javascript 클래스를 사용합니다.


드래그를 위해 DragBox라는 클래스를 사용하고 있으며이 클래스도 그룹을 확장합니다. 나는 아이들을 여기에 추가하고 있지 않지만 내장 된 업데이트 기능을 사용할 수 있도록 그룹을 확장 중입니다. 드래그 해야하는 객체는 DragBox의 인스턴스로 유일한 매개 변수로 전달됩니다.

class DragBox extends Phaser.Group {

    constructor(dragObj) {

        super(game);

        this.dragObj = dragObj;

        game.input.onDown.add(this.onDown, this);

    }

    onDown() {

        //set canDrag to false

        this.canDrag = false;

        //check if the mouse is in bounds

        //since my dragObject is the full width of the game

        //I only need to check the y position

        //The top of the drag object is the y position

        //and the bottom is the top plus the height

        //

        if (game.input.y > this.dragObj.y && game.input.y < (this.dragObj.y + this.dragObj.height)) {

            //set the canDrag to true;

            this.canDrag = true;

            //get the start position of the dragObject

            //so we may compare it to the current position

            //when dragging

            this.startY = this.dragObj.y;

            //the offset is how far down on the grid the

            //mouse is when the user started dragging

            //without this line the grid will jump when

            //the drag starts

            this.offSet = this.dragObj.y - game.input.y;

        }

    }

    update() {

        if (game.input.mousePointer.isDown) {

            if (this.canDrag == true) {

                //calculate the difference between the startY

                //and the current mouse y position

                //and add in the offSet

                var diff = game.input.y - this.startY + this.offSet;

                //update the start position

                //by adding the difference to the start position

                this.dragObj.y = this.startY + diff;

            }

        }

    }

}

대부분의 코드는 주석입니다. 노트가 없는 코드는 약 23 행뿐입니다.

class DragBox extends Phaser.Group {

    constructor(dragObj) {

        super(game);

        this.dragObj = dragObj;

        game.input.onDown.add(this.onDown, this);

    }

    onDown() {

        this.canDrag = false;

        if (game.input.y > this.dragObj.y && game.input.y < (this.dragObj.y + this.dragObj.height)) {

            this.canDrag = true;

            this.startY = this.dragObj.y;

            this.offSet = this.dragObj.y - game.input.y;

        }

    }

    update() {

        if (game.input.mousePointer.isDown) {

            if (this.canDrag == true) {

                var diff = game.input.y - this.startY + this.offSet;

                this.dragObj.y = this.startY + diff;

            }

        }

    }

}


그룹을 직접 드래그하려면 코드 클래스를 직접 복사하여 프로젝트에 포함해야합니다.


그런 다음, 이 코드를 사용하여 개체를 만든 직후에 구현합니다.

var dragBox = new DragBox(objectYouWantToDrag);


이렇게하면 객체를 세로로 드래그 할 수 있지만 코드는 수평이 좋도록 조정할 수 있습니다.

다음은 내가 하는 일의 예입니다.

먼저 Phaser 그룹을 확장하는 그리드 클래스를 만들었습니다.

이 그리드 클래스는 같은 크기의 자식 요소 용입니다.

열 수에 'cols' 매개 변수가 필요합니다.

class Grid extends Phaser.Group {

    constructor(cols) {

        super(game);

        this.cols = cols;

    }

    arrange() {

        var xx = 0;

        var yy = 0;

        this.children.forEach(function(item) {

            //place the item on a column with a 10 percent buffer

            item.x = item.width * xx * 1.1;

            //place the item on a row with a 10 percent buffer

            item.y = item.height * yy * 1.1;

            xx++;

            if (xx ==this.cols) {

                xx = 0;

                yy++;

            }

        }.bind(this));

    }

    center() {

        this.x = game.width / 2-this.width/2;

        this.y = game.height / 2-this.height/2;

    }

}


미리보기 이미지의 경우 Box라는 클래스를 사용하고 있습니다. 이것은 단순히 마우스 리스너가 연결된 이미지가 포함 된 그룹을 확장하는 클래스입니다.

class Box extends Phaser.Group

{

constructor()

{

super(game);

var thumb=this.create(0,0,"box");

thumb.anchor.set(0.5,0.5);

thumb.inputEnabled=true;

thumb.events.onInputDown.add(this.clicked);

}

clicked()

{

console.log("click");

}

}


그리고 이건 내 stateMain.js 코드입니다.

var StateMain = {

    preload: function() {

        game.load.image("box", "images/box.png");

    },

    create: function() {

        //make a grid

        //

        this.grid = new Grid(5);

        //make 30 boxes and add to the grid

        //

        for (var i = 0; i < 30; i++) {

            var box = new Box();

            this.grid.add(box);

        }

        //arrange the child objects into a grid

        //

        this.grid.arrange();

        //center on stage

        //

        this.grid.center();

        //make a dragBox and pass the grid to it

        //

        var dragBox = new DragBox(this.grid);

    }

}

그리고 드래그 그룹 코드가 실제로 작동합니다. 개발자 콘솔을 열면 사각형이 여전히 클릭 가능한지 확인할 수 있습니다. 드래그 중에 실수로 사각형이 클릭되지 않도록하려면 마우스를 아래로 내리고 마우스를 위로 올리는 시간을 확인하는 함수를 구현할 것입니다. 그것은 빠른 다음 그렇지 않으면 클릭이 될 것입니다, 나는 사용자가 드래그하고 있다고 가정합니다.


'PROGRAMMING > Phaser Js' 카테고리의 다른 글

Phaser Js 에서 미사일 만들기  (0) 2018.01.27
Phaser Js 와 클래스(Class)  (0) 2018.01.27
Phaser Js - Audio Delay -  (0) 2018.01.27
Phaser Js - Complex Objects –  (0) 2018.01.27
Phaser Js 에서 오브젝트 크기 조절하기  (0) 2018.01.27
Posted by 마스터킹
|

이것은 나에게 여러 번 일어났습니다. 다시 Phaser 오디오 딜레이에 직면 해 있습니다! 나는 준비가되어있다. 예술 자산이 들어가고 점수 판이 작동하며 내일 게임을 시작해야합니다! 빨리 배경 음악을 넣고 반복하십시오. 게임은 시작되지만 음악은 어디에 있습니까 ???


3 초 기다려 ...


거기는! 그것은 성가신 지연이지만 우리는 그것을 무시하기 위해 시작해야합니다. 그 밖의 무엇을 할 수 있습니까?


이제 마감 기한을 넘기지 않고 다시 물러나서 무슨 일이 일어나는지 살펴 보겠습니다. 나는 왜 음악을 미리 불러 들여서 지연시킬까요?


나는 당신에게 문제를 보여주기 위해 표본을 모았다. 다음은 일반적으로 음악을로드하는 코드입니다. 이미지가 정상 속도로로드되는 것을 볼 수 있도록 이미지를 배치합니다. 또한 타이머가 포함되어 있으므로 지연되기 전에 몇 초가 지나야하는지 확인할 수 있습니다.

sdsd

var StateMain = {

    preload: function() {

        game.load.audio("music", "audio/music.mp3");

        game.load.image("title", "images/Cool-Game-Title.png");

    },

    create: function() {

        this.secs = 0;

        //create the music

        var music = game.add.audio("music");

        //play the music

        music.play();

        //

        //

        //

        //put the title on screen

        var title = game.add.image(game.width / 2, game.height / 2, "title");

        title.anchor.set(0.5, 0.5);

        //make the timer text

        this.timeText = game.add.text(game.width / 2, 100, "0",{fill:'#ffffff'});

        this.timeText.anchor.set(0.5, 0.5);

        //start counting seconds

        game.time.events.loop(Phaser.Timer.SECOND, this.tick, this);

    },

    tick: function() {

     this.secs++;

        this.timeText.text = this.secs;

    },

    update: function() {}

}

그럼 여기서 뭐하는거야? 어쨌든이 Phaser 오디오 지연의 원인은 무엇입니까? 미리로드 된 경우에도 재생하는 데 몇 초가 걸리는 이유는 무엇입니까? 음, 나는이 게시물에서 오디오가 디코딩되어야 할뿐만 아니라로드 될 필요가 있음을 지적하는 몇 가지 해답을 발견했습니다. 브라우저가 재생되기를 기다리는 동안 브라우저가 수행하는 작업입니다.


Phaser는 음악 파일이 디코딩되었는지 여부를 감지 할 수 있습니다.

game.cache.isSoundDecoded('music');


이 함수는 진실 또는 거짓을 돌려 줄 것입니다. 따라서 우리가 사용할 수있는 솔루션은 stateLoad라는 별도의 상태에서 모든 것을 로드하는 것입니다.

사전로드가 완료되면 업데이트 기능을 사용하여 음악이 디코딩되었는지 확인합니다.

그렇다면 상태를 stateMain으로 전환합니다. 사용자가 게임을 시작한 후보다 로딩 화면에서 기다리는 것이 게임 업계에서 잘 받아 들여지고 있습니다.

일반적으로 로딩 화면에는로드 바 또는 일부 메시지가 포함되지만 기술적 인 예에서는 충분합니다.


var StateLoad = {

        preload: function() {

            game.load.audio("music", "audio/music.mp3");

            game.load.image("title", "images/Cool-Game-Title.png");

        },

        create: function() {

         //only fires after preload is done

            var statText = game.add.text(game.width / 2, 100, "Decoding....", {

                fill: '#ffffff'

            });

            statText.anchor.set(.5, .5);

        },

        update: function() {

         //check to see if the audio is decoded

            if (game.cache.isSoundDecoded('music')) {

                    game.state.start("StateMain");

                }

            }

        }

var StateMain = {

    preload: function() {

       //moved loading here to stateLoad

    },

    create: function() {

        this.secs = 0;

        //create the music

        var music = game.add.audio("music");

        //play the music

        music.play();

        //

        //

        //

        //put the title on screen

        var title = game.add.image(game.width / 2, game.height / 2, "title");

        title.anchor.set(0.5, 0.5);

        //make the timer text

        this.timeText = game.add.text(game.width / 2, 100, "0",{fill:'#ffffff'});

        this.timeText.anchor.set(0.5, 0.5);

        //start counting seconds

        game.time.events.loop(Phaser.Timer.SECOND, this.tick, this);

    },

    tick: function() {

     this.secs++;

        this.timeText.text = this.secs;

    },

    update: function() {}

}


결과는 다를 수 있지만 내 로컬 호스트에서 음악은 두 번째 테스트에서는 0으로, 첫 번째 테스트에서는 약 3에서 재생됩니다.


Posted by 마스터킹
|

대부분 우리가 Phaser에서 게임을 만들때 우리는 스프라이트, 텍스트 또는 버튼 같은 간단한 객체를 사용하고 있습니다. Phaser에 글쓰기를 정말 좋아하지만 플래시 게임을 만들 때 사용하지 않을 때가 있습니다. 수업 내에서 다양한 요소를 만들 수 있습니다. Phaser로는 똑같은 일을 할 수는 없지만 복잡한 대상을 만드는 함수를 만드는 것이 가능합니다. 복잡한 객체는 단순히 자식 요소가 포함 된 그룹을 설명하는 데 사용하는 구문입니다. 이런 식으로, 나는 기본적으로 내가했던 것과 똑같은 결과를 얻을 수있었습니다.


이 예제에서는 버튼 객체를 만드는 함수를 작성했습니다. 이 경우 Phaser 프레임 워크에 내장 된 버튼이 아니라 텍스트 필드와 스프라이트가 포함 된 그룹입니다. 이것은 필요한 버튼이 무엇인지 모르는 상황에서 유용하기 때문에 한 줄의 코드로 새로운 버튼을 제작 할수 있습니다.


나는 최근에 한 게임에서 우주선 내부의 글자와 다른 게임에서의 거품으로 된 글자로 알파벳을 배우는 아이들을 위해 쓰고있는 몇 가지 게임에 대해이 기술을 사용했습니다. 나는 단순히 makeBubble 또는 makeShip 함수를 작성하고 필요한 모든 것을 만들기 위해 알파벳을 반복했습니다.


이 기술을 사용하려면 4 가지 작업을 수행해야합니다.

1. 스타일 (텍스트, 색상, 크기, 프레임)에 대한 매개 변수가있는 함수 만들기

2. 그 스타일 선택을 반영하는 자식 요소 만들기 (스프라이트, 텍스트 필드)

3. 그룹을 만들고 그 안에 요소들을 넣으십시오.

4. 그 그룹을 객체로 반환한다.


makeButton 함수로이 작업을 수행하고 create 함수에 버튼을 만들었습니다.


var StateMain = {

    preload: function () {

     game.load.spritesheet("colors","images/colors.png",150,50);

    },

    create: function () {      

       var btnYes=this.makeButton("YES",1);

       btnYes.y=game.height*.25;

       btnYes.x=game.world.centerX;

       var btnNo=this.makeButton("NO",0);

       btnNo.y=game.height*.75;

       btnNo.x=game.world.centerX;

       this.statusText=game.add.text(game.world.centerX,game.world.centerY,"");

       this.statusText.fill="#ffffff";

       this.statusText.anchor.set(0.5,0.5);      

    },

    makeButton:function(text,color)

    {

     //create the back for the button

     var back=game.add.image(0,0,"colors");

     back.frame=color;

     //create the label for the button

     //and set the text to the text parameter passed down

     var label=game.add.text(0,0,text);

     back.anchor.set(0.5,0.5);

     label.anchor.set(0.5,0.5); 

     //create the group

     var buttonGroup=game.add.group(); 

     //add the sprite and the label to the group

     buttonGroup.add(back);

     buttonGroup.add(label); 

     //groups can not take input so we need to add the

     //listener for the click

     back.inputEnabled=true;

     back.events.onInputDown.add(this.buttonClicked,this);

     //return the group as the button

     return buttonGroup;

    },

    buttonClicked:function(target)

    {

     //since the target is the sprite

     //we get the parent of the target

     //

     var group=target.parent;

     //the label is the second child we added to the

     //group so we can find it at index 1

     //the back sprite is found at index 0

     var label=group.getChildAt(1); 

     this.statusText.text=label.text; 

    },

    update: function () {

    }

}


Posted by 마스터킹
|

모바일의 부상으로, 나는 더 자주 객체의 크기를 조정해야한다는 것을 알게되었습니다. 이것은 화면 크기의 차이를 보완하기위한 것입니다. 높이나 너비와 같은 속성 하나를 변경하는 것은 쉽지만 이미지 비율이 비례해야하는 것이 더 좋으므로 다음과 같은 공식이 필요합니다.

new_width = old_width*(new_height/old_height);


가로 세로 비율 유지하기

Phaser에서 걱정할 필요가 없습니다.스프라이트의 높이나 너비를 변경하면 스케일 객체 속성이 업데이트됩니다. 예를 들어 스프라이트의 너비를 변경하면 scale.x 속성이 변경됩니다.


너비를 변경하면 scale.x를 scale.y로 복사합니다.

mySprite.scale.y=mySprite.scale.x;


높이를 변경하면 반대로 하면됩니다.

mySprite.scale.x=mySprite.scale.y;


실제 샘플 코드 입니다.

var StateMain = {


    preload: function () {

     game.load.image("doughnut","images/doughnut.png");

    },


    create: function () {


     this.makeDoughnuts();

     game.input.onDown.add(this.makeDoughnuts, this);

    },

    makeDoughnuts:function()

    {

     for (var i = 0; i < 5; i++) {

     var doughnut=game.add.sprite(game.world.randomX,game.world.randomY,"doughnut");


     doughnut.width=game.rnd.integerInRange(50, 150);

     //when we change the width, we automatically change the scale.x

     //setting the scale.y to scale.x will make the

     //object proportional

     doughnut.scale.y=doughnut.scale.x;

     }

    },

    update: function () {


    }


}


Posted by 마스터킹
|

Add Text

설명 : 스테이지에 텍스트 입력란 추가

var myText=game.add.text(x,y,text);


Center text

설명 : x 앵커를 너비의 50 %로 설정하여 텍스트 위치를 가운데로 맞춤

myText.anchor.x = Math.round(myText.width * 0.5) / myText.width;


Text font

설명: 텍스트의 폰트명 설정

myText.font="font_name";


Set text color

설명 : 텍스트 필드 색상을 설정합니다.

myText.fill="#textColor";


Font size

설명 : 텍스트 필드의 글꼴 크기를 설정합니다.

myText.fontSize=64;


Fancy Fonts

설명 : 텍스트 추가 기능의 네 번째 매개 변수를 사용하여 고급 글꼴 속성을 설정합니다.

this.titleText=game.add.text(x,y,text,{ font: "size fontName", fill: "color", stroke: "color", strokeThickness: number, align:string });

Posted by 마스터킹
|

Add a button

섫명:

game.add.button(x,y,imageKey,clickFunction,this,over_frame,normal_frame,down_frame)


Sprite click

설명:

this.char1.events.onInputUp.add(this.clickHandler,scope);


Enable a sprite for input

설명 : 스프라이트에서 클릭 이벤트를 사용할 수 있으려면 먼저 입력에 사용하도록 설정해야합니다.

this.spriteName.inputEnabled=true;


Canvas click

설명 : 전체 게임에 리스너 추가

game.input.onUp.add(functionName, this);


Posted by 마스터킹
|

Start the physics engine

설명 : Arcade Physics 엔진을 시작합니다.

game.physics.startSystem(Phaser.Physics.ARCADE);


Enable an object for physics

설명 : Phaser에게 선택된 객체에 물리엔진을 사용하도록 알려줍니다.

game.physics.enable(sprite, Phaser.Physics.ARCADE);


Set velocity

설명 : 객체의 속도를 설정합니다.

this.char.body.velocity.setTo(200,200);


Set bounce

설명 : 객체가 충돌 할 때 바운스를 설정합니다. 1은 100 % 바운스입니다. .5는 50 %

this.body.bounce.set(1,1);


Set Global Gravity

설명 : 모든 객체의 기본 중력을 설정합니다.

game.physics.arcade.gravity.y = 100;


Set object gravity

설명 : 개별 스프라이트의 중력을 설정합니다.

this.char.body.gravity.y = 50;


Set group physics

설명 : 그룹에 물리엔진을 설정합니다.

myGroup.enableBody = true;

myGroup.physicsBodyType = Phaser.Physics.ARCADE;


Posted by 마스터킹
|

Insert Image Into Library

설명 : 이미지를 라이브러리에 추가하고 코드에서 사용할 수 있도록합니다.

도움말 : 프리로드 섹션에서 사용하십시오.

game.load.image(library_key,path_to_image);


Add Image to the Stage

설명 : 스프라이트를 스테이지에 추가

this.char1=game.add.sprite(x,y,library_key);

Preload Sprite Sheet

설명 : 스프라이트 시트를 라이브러리에 미리로드합니다.

game.load.spritesheet('ref_name', 'pathto.png', sprite_width, sprite_height, number_of_cells);


Set Sprite Top Position

설명 : 스프라이트와 맨 위의 거리를 설정합니다.

this.char1.y=top_postion;


Set the Left Position of a Sprite

설명 : 스프라이트의 왼쪽 위치를 설정합니다.

this.char1.x=left_position;


Set the registration point for a sprite

설명 : 스프라이트의 포인트를 설정합니다. 예를 들어 앵커를 0,0으로 설정하면 스프라이트의 왼쪽 위 모서리에 위치 지정이 적용됩니다. 앵커를 0.5,0.5로 설정하면 스프라이트 중간에 위치가 적용됩니다.

this.char1.anchor.setTo(left,top);


Add an animation to a sprite

설명 : 스프라이트의 애니메이션을 정의합니다.

mysprite.animations.add('walk', frame_array, frames_sec,loopBoolean);


Play an animation

설명 : .animations.add에 의해 정의 된 스프라이트에서 애니메이션을 재생합니다.

mysprite.animations.play('animation name');


Add a mask to a sprite

설명 : 그래픽을 부분적으로 가릴 마스크를 추가합니다.

// A mask is a Graphics object

    mask = game.add.graphics(0, 0);

    // Shapes drawn to the Graphics object must be filled.

    mask.beginFill(fill_color);

    // Here we'll draw a circle

    mask.drawCircle(left, top, radius);

    // And apply it to the Sprite

    sprite.mask = mask;


Set sprite frame

설명 : 간단한 이미지 대신 스프라이트 시트를 사용하는 스테이지에 스프라이트를 추가하면 표시되는 프레임을 선택할 수 있습니다

sprite.frame=frame_number;


Add a group

설명:

var myGroup=game.add.group();

myGroup.add(sprite);


Add a Tilesprite

설명 : 여러개로 결합 된 스프라이트를 추가합니다. 배경 스크롤에 사용됩니다.

this.tileSprite = game.add.tileSprite(x, y, width, height, 'key');


Prototype template

설명 : 이것을 사용하여 스프라이트에 대한 prefab/class 만들기

var Monster = function(x=0, y=0, frame=0) {

  Phaser.Sprite.call(this, game, x, y, 'monster', frame);

  // initialize your prefab here

};

Monster.prototype = Object.create(Phaser.Sprite.prototype);

Monster.prototype.constructor = Monster;

Monster.prototype.update = function() {

  // write your prefab’s specific update code here

};


Create sprite in group

설명:

group.create(x, y,'key');


Loop through group

설명:

myGroup.forEach(function(item) {        

        }.bind(this));


Create multiple

설명:

myGroup.createMultiple(20, 'myKey', 0, false);


Detect the end of an animation

설명 : 애니메이션이 완료되면 함수를 호출합니다.

myAnimation.onComplete.add(function, scope);


Load a sprite sheet with json

설명 : JSON 데이터로 스프라이트 시트를 로드합니다.

game.load.atlasJSONHash('letters',"images/main/letters.png","images/main/letters.json");


Posted by 마스터킹
|

Phaser Js 로 게임 개발을 할때, Start 부분에서 사용되는 기본적인 코드에 대해서 알아봅시다.


Blank State

설명 : 필수 기능이있는 빈 상태 템플릿입니다.

var StateMain={      

   preload:function()

    {      

    },  

    create:function()

    {      

    },  

    update:function()

    {              

    }      

}


Switch states

설명 : 상태를 변경합니다. 예를 들어 게임이 종료 된 경우 game.state.start ( "StateGameOver")를 호출 할 수 있습니다.

game.state.start(state_name);


Start for Desktop

설명 : Phaser Js를 시작하는 데 필요한 기본 파일입니다.

var game;

window.onload = function()

{

    game=new Phaser.Game(480,640,Phaser.AUTO,"ph_game");

    game.state.add("StateMain",StateMain);

    game.state.start("StateMain");

}


Start for Dekstop/Mobile

설명 : 모바일을 지원하는 Phaser Js를 시작하는 데 필요한 기본 파일입니다.

var game;

var useLandscape=false;

window.onload = function () {

var isMobile=navigator.userAgent.indexOf("Mobile");

if (isMobile>-1)

     {

        isMobile=true;

     }

     else

     {

        isMobile=false;

     }

    if (isMobile==false) {

        //desktop laptop

        if (useLandscape == true) {

            game = new Phaser.Game(640, 480, Phaser.AUTO, "ph_game");

        } else {

            game = new Phaser.Game(480, 640, Phaser.AUTO, "ph_game");

        }

    } else {

        //mobile device

        game = new Phaser.Game(window.innerWidth, window.innerHeight, Phaser.AUTO, "ph_game");

    }

    game.state.add("StateMain",StateMain);

    game.state.start("StateMain");

}


Basic HTML

설명: Phaser Js 용 html

<!DOCTYPE html>

<html lang="">

<head>

    <meta charset="UTF-8">

    <title>Game Title Here</title>

    <script src="js/phaser.min.js">

    </script>

    <script src="js/main.js"></script>  

</head>

<body>

</body>

</html>


Full Screen Meta Tag

설명: 모바일 용 전체 화면에 html을 삽입하는 메타 태그

<meta name="viewport" content="user-scalable=0, initial-scale=1,minimum-scale=1, maximum-scale=1, width=device-width, minimal-ui=1">


Sample Init State

설명 :이 샘플을 사용하여 init 상태를 만듭니다. 초기화 상태는 실행을위한 베어 본 코드를 설정하고 로드 상태를 준비합니다.

var StateInit = {


    preload: function () {

        game.load.image("loadingEmpty", "images/loading/progress_none.png");

        game.load.image("loadingFull", "images/loading/progress_all.png");

        game.scale.forceOrientation(true, false);

        game.scale.enterIncorrectOrientation.add(this.wrongWay, this);

        game.scale.leaveIncorrectOrientation.add(this.rightWay, this);

    }

    , create: function () {

        game.state.start("StateLoad");

    }

    , update: function () {

    }

    , rightWay: function () {

        document.getElementById("wrong").style.display = "none";

    }

    , wrongWay: function () {

        document.getElementById("wrong").style.display = "block";

    }

}


Samepl Load State

설명 :로드 상태는 게임을 시작하기 전에 모든 것을 미리로드 할 수있게합니다.

var StateLoad = {

    preload: function () {

        var empty = game.add.image(0, 0, "loadingEmpty");

        var full = game.add.image(0, 0, "loadingFull");

        empty.x = game.world.centerX;

        empty.y = game.world.centerY;

        empty.anchor.set(0.5, 0.5);

        full.anchor.set(0, 0.5);

        full.x = game.world.centerX - empty.width / 2;

        full.y = empty.y;

        game.load.setPreloadSprite(full);

        //PRELOAD EVERYTHING HERE

    },

    create: function () {

        game.state.start("StateTitle");

    },

    update: function () {

    }

}

Posted by 마스터킹
|

phaser를 배우는 개발자가 가장 먼저 배워야 할 것은 phaser에 이미지를 추가하는 방법입니다. 그리고 그과정은 정말 쉽습니다. 이미지를 라이브러리에로드 한 다음 스테이지에 배치하는 2 단계 프로세스입니다. 저는 그것을 초보자를위해 4단계 과정으로 정리해 보겠습니다.


1 단계. 기본 템플릿 다운로드

템플릿 폴더의 이름을 프로젝트 이름 (예 : ImageTest)으로 바꾸고 좋아하는 편집기로 폴더를 엽니다.


2 단계. 프로젝트에 이미지 추가하기

프로젝트 내부에 폴더를 만들고 내부에로드 할 이미지를 추가하십시오.


3 단계. 이미지를 라이브러리에 로드하십시오.

이 코드를 stateMain.js 파일의 preload 함수 안에 넣으십시오.

game.load.image("monster","images/monster.png");


game.load.image는 다음과 같이 작동합니다.

game.load.image(unique_key,path_to_image);


4 단계. 이미지를 캔버스에 놓습니다.

create 함수 내에서 game.add.sprite 코드를 사용하십시오.

game.add.sprite(100,200,"monster");


game.load.sprite는 다음과 같이 작동합니다.

game.add.sprite(x,y,unique_key);


다음은이 작업을 수행하는 방법을 보여주는 비디오입니다.


Posted by 마스터킹
|